Sunday, March 31, 2013

Laid-Back 31 DC: A New Technique

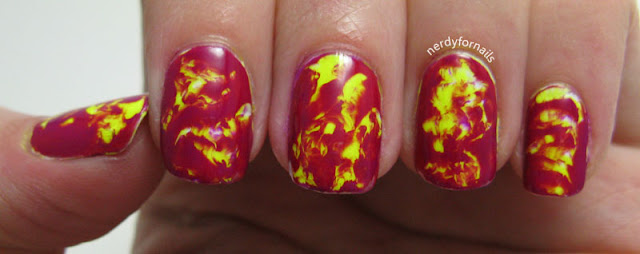
Today's challenge calls for a new technique. I've seen these acid wash nails on a few blogs and thought today was the perfect day to try them. I particularly love these from Smashley Sparkles, but I didn't realize until just now that she did them for this same day during the original 31 Day Challenge. I guess it really was meant to be. It's also Easter today so the pretty pastels feel even more appropriate.


I'm sure I was probably supposed to let each color dry completely between coats, which of course I didn't, as you can see from the air bubbles that started showing as I got down to the bottom layers. I did wait until the next morning before I took a q-tip dipped in acetone and rubbed away the top layers to show the pretty colors hidden underneath.


This is probably one of my new favorite manicures. I love the way these colors look together. I started with Spoiled, Fuzzy Dice and then layered on Sinful Colors, Unicorn (yellow), Wet n Wild, I Need A Refresh-Mint, and Sinful Colors, Candy Coated (lavender).


Easter bonus: I made this cake for Easter dinner with the family. I had seen this tutorial and after I had painted my nails such pretty pastel colors I knew the cake had to match.

Wednesday, March 27, 2013

Laid-Back 31 DC: Color Opposites

I hate to say it, but I think this may be my least favorite challenge theme so far. I don't like any of the color opposites that much. They're just all so... clashy. I decided to go with the yellow-green and red-violet combination. At least I can say the colors are bright and fun for spring.


I started with two coats of Sally Hansen, Limestone and then attempted to do a gradient with Finger Paints, Guggen I'm Lime. The second shade is nice and shimmery, but not very opaque so the gradient got entirely lost on the lime base. I used Sinful Colors, Dream On and a small striping brush to paint on the zebra stripes.


Sunday, March 24, 2013

Laid-Back 31 DC: Water Color

Due to my inability to make up my mind I've got a double water color mani for you today. After a google search I didn't find a single water color mani that used dark colors. There may be a very good reason for that (water color is typically pastel, those colors blend more nicely together, etc...) but of course I had to ignore that and try it anyway. I also had a brand new never-tried lavender that was just begging to get used. Of course the only natural thing to do was to put a different combination on each hand.
 

Up first I have my pastel water color. I started with a while base of Sally Hansen, White Tip then layered on dots of polish and dabbed them out with a paintbrush dipped in acetone. The colors I used in order are:
Grey- China Glaze, Recycle
Lavender- Sinful Colors, Candy Coated
Mint- Sinful Colors, Mint Apple
Holo- Color Club, Harp On It


Even though the darker combo isn't my favorite I'm still glad I tried it. Up close the colors really do look great together and it's slightly different twist on the typical water color.
Charcoal- China Glaze, Black Diamond
Red- Spoiled, Hit The Brakes
Silver- Spoiled, Daddy's Credit Card
Silver glitter- Sinful Colors, Queen of Beauty


 Which version do you like better?


Thursday, March 21, 2013

Gold Glequins

Today is my first non challenge related post in quite a while. I came up with this design while I was playing around with the glequins used in my St Patrick's Day manicure and it ended up turning out really cute.


I used Wet n Wild, I Need A Refresh-Mint for the three blue nails. Which leads me to ask why is this color named mint when it's clearly something between turquoise and robin's egg? The gold nails are two coats of Sally Hansen Complete Manicure, Golden Rule. I added the gold glequins individually to each finger for a little extra sparkle sparkle.


Tuesday, March 19, 2013

Laid-Back 31 DC: Stamping

I was a little bit nervous about today's challenge because I haven't had very good luck with stamping up until now. I can definitely say that this is my best attempt to date. I started out in the world of stamping with my "As Seen On TV" Salon Express kit that I got at Target for $10. I thought it was worth a try, but let me tell you, that whole kit is pretty much complete crap. The 5 plates it comes with are too small to be useful and the stamper is awful.
 

This is my first try at stamping with my new stamper from Born Pretty. I was a little skeptical since it only cost $3, but I have to say I'm pretty impressed. Even with my nonexistent stamping skills it turned out a pretty decent manicure.


I thought with this manicure I might actually prefer it matte. The first two pictures here show it with NYC Matte Me Crazy top coat. But of course I couldn't wait more than 10 minutes before I was dying to know what it would look like shiny so I added a coat of Seche Vite. Which way do you prefer?


I used: 2 coats of Ulta, Set the Nude. This is the worst Ulta formula I've gotten yet. It was gooey and streaky at the same time. All the other Ulta's I've tried have been much easier to work with so I'm not sure what's going on with this one. I do like the color though. I stamped with Wet n Wild, Black Creme using Bundle Monster plate BM-322.


Saturday, March 16, 2013

Laid-Back 31 DC: Cheer Yourself Up Mani

The theme for today is a "cheer yourself up mani" and I'd say this does the job. I don't have a go-to manicure that I paint when I'm sad or low on inspiration, at least not yet. That means my "cheer me up mani" is going to be something different every time and I like it that way. Rainbows, glitter and cheesy holiday themed nail art... how much better can it get?
 

I finally got to use the glequins I ordered from Born Pretty recently. If you don't know what glequins are yet be sure to check out this post by The Nailasaurus.


This manicure used a ton of colors (13 plus base coat and two kinds of top coat).
Blue background- Wet n Wild, I Need A Refresh-Mint
Gold- (just two coats- great coverage) Sally Hansen Complete Manicure, Golden Rule
Large gold glequins- Born Pretty layered on top of the small gold glitter
Red- Spoiled, Hit The Brakes
Orange- Wet n Wild, Sunny Side Up with Zoya, Gabrielle on top
Yellow- Sally Hansen Insta-Dri, Expres-so Yellow
Green- Spoiled, Permission to Proceed
Blue- China Glaze, Shower Together
Purple- Love & Beauty, (missing label)
Black- Wet n Wild, Black Creme
Grey shading on the pot o' gold- China Glaze, Recycle
Light grey background (thumb)- Sally Hansen Complete Manicure, Ion
White cloud- Finger Paints, Paper Mache

 
And since this post is all about cheering myself up I couldn't resist adding this adorable picture of a baby goat. I can't help feeling that I would have loved to study anatomy much more in school if it was more like this.


Tuesday, March 12, 2013

Laid-Back 31 DC: Tape Mani

Today I got to do my second ever tape manicure. You can see my first one here if you're curious. I love how crisp the lines come out and the tape is pretty easy to work with. The hardest part is waiting for the polish to dry so I don't peel it up when I pull the tape off.
 

I only wish I had been slightly less lazy for my accent nail and used the tape there as well instead of painting it on with a striping brush. It looks good from a distance, but up close the imperfections are much more noticeable especially next to the crisp tape stripes.


Do these colors look familiar? I reused two from Sunday's manicure for this pink ombre effect. I started by painting a stripe down one side of the nail using the brush from the bottle of Ulta's Eye Popping Poppy. I painted another stripe in the middle using Spoiled, Fuzzy Dice. The last stripe is one coat of Sinful Colors, Easy Going and another coat of Ulta, Diva on top. For the taped nails I lined up bits of tape over each stripe of color, painted black (Wet n Wild, Black Creme) over the whole thing and then peeled the tape up while the polish was still wet.


Sunday, March 10, 2013

Laid-Back 31 DC: Splatter

Today's theme is splatter, another technique I hadn't tried yet. I love that I'm getting to do so many new things with this challenge. I would have gotten around to it eventually, but this is like a big fast forward button.
 
 
I started out today's challenge with only large drinking straws and no idea how it was going to work. It doesn't. You really do need some of those tiny straws used for stirring coffee. Since I didn't have those my brilliant husband figured out that if you cut a groove out of a chop stick and shove that into the large straw it creates the right sized channel to blow the paint through. I missed quite a few times before I actually got paint on my nails, but even still the clean up wasn't too bad and I love the effect.
 
 
A brand new Ulta opened this weekend near my house so I went down there this morning to see what deals there were to be had. The first 100 people in the door got gift certificates for $5 - $100 and I was lucky to get one for $10. I picked up a few new colors and couldn't resist using two of them for today's manicure. I don't know what I'll do for the oldest untried day of the challenge because I can never wait to try any of my new polishes and usually work them into a manicure within the first week.
 

 The base color is two coats of Ulta's Diva. It's a sheer pink jelly with little bits of iridescent glitter. It makes me think I could have been a ballerina in a different life. Well, maybe a ballerina with hot pink hair. The splatters were done with Ulta's Eye Popping Poppy and Wet n Wild, Black Creme.


 We're only up to day eleven. There are still so many more fun manicures to come. Are you looking forward to seeing anything in particular? I'm excited for "Inspired by Fabric" since I tend to do those a lot on my own. I love when my nails match my clothes.


As always check here to see what the other ladies have come up with.


Tuesday, March 5, 2013

Laid-Back 31 DC: Geometric

I love today's challenge. Painting the tiniest, most complicated patterns I can find onto my nails is totally my kind of thing. I thought about going with a stamp, but I'm still horrible at stamping. Plus I kind of like the imperfections that come with hand painting. 


I searched google for some inspiration and found this. It's definitely a lot harder than it looks to freehand. The pinkie was my first attempt, but I got all the lines too boxy instead of angled like the picture. I tried again on the middle finger, but it didn't really work out too well. I liked the design well enough though and decided to keep it.


I used:
2 coats of Sally Hansen Complete Manicure in Ion
Sinful Colors in Dream On (purple)
Spoiled, Distant Memory (teal)
A tiny paintbrush and a lot of patience


There are so many possibilities for this challenge. I can't wait to see all the others.


Sunday, March 3, 2013

Laid-Back 31 DC: Saran Wrap

Today's theme is Saran Wrap manicures. I hadn't tried out this technique yet so I was excited for today's challenge. I wanted to use contrasting colors and these looked great in the bottles. I was a little afraid that the yellow would darken the neon purple and it did, but not too badly. The colors do look much brighter in the bottle though. This just means I'll get to have fun trying this out with many more color combinations later.
 
 
I really love the marbleization on the middle finger! This technique is super easy. I painted on my base color (neon yellow) first, waited for it to dry. Then I painted the purple on one finger at a time and dabbed the wet polish with a little ball of saran wrap until I had enough of the yellow showing.
 
 
 Shown here:
 1 coat of Sally Hansen, White Tip (under the yellow to help it pop)
1 coat Spoiled, Did I Dye It Too Blonde?
1 coat Sinful Colors, Dream On
1 coat Seche Vite


Friday, March 1, 2013

Pokemon Challenge Week 7: Electric

Pika! I know a lot of people think Pikachu is overrated, but I still think he's awesome. There are surprisingly few electric Pokemon to choose from, but it's not like it was a contest anyway. I was always going to pick Pikachu.
 

Pikachu, use Thunderbolt! Is what I would yell when rude people cut me off in traffic (if I had a Pikachu). It's really a shame they don't exist.


For my Pikachu I started with 2 coats of Sally Hansen, White Tip. I painted his head using the brush from the bottle of Sally Hansen, Expres-so Yellow, then added the ears with a small brush. The black accents are Wet n Wild, Black Creme and the red cheeks are Spoiled, Hit the Breaks. For my Thunderbolts I used one coat of Ulta, Moody Blues. I painted the bolts in white and then went over them with Spoiled, Did I Dye It Too Blonde?

 
I hope you like my Pikachu and don't forget to see what everyone else has come up with this week.