Monday, October 26, 2015

Velvet Gradient and a Sparkly Spider

Black and Red Vampy Velvet Gradient with Spiderwebs and Rhinestone Spider

Halloween week continues with these dark and vampy spider nails. I did a similar look last year, and loved it so much I had to reinvent it again. This year I went darker and matte with new coffin shaped nails that I'm loving. I think it really completes the look.

Black and Red Vampy Velvet Gradient with Spiderwebs and Rhinestone Spider

Black and Red Vampy Velvet Gradient with Spiderwebs and Rhinestone Spider

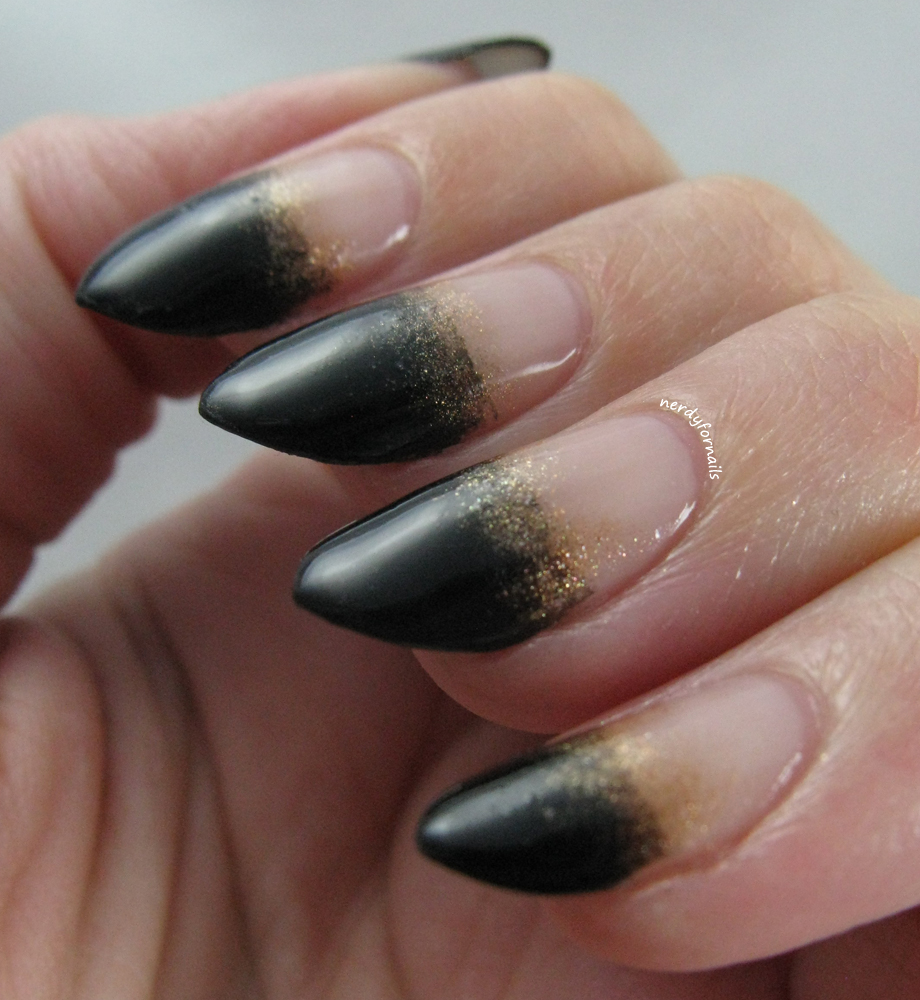
Above I have a shot minus the spider which is really more accurate to how I'm wearing these nails because the spider came off less than three hours after I glued it. It was really cute for the photos, but the legs were catching on everything and it popped right off. I got the spider charm from Miss A (all the nail art supplies there are $1 each). 

My base color is Sinful Colors, Black on Black. I sponged on a gradient of Wet n Wild, Under Your Spell and Sation, Sparkling Ruby. I topped it off with Wet n Wild Matte Top Coat and then painted the web using Color Club, Harp On It for contrast.

Black and Red Vampy Velvet Gradient with Spiderwebs and Rhinestone Spider

This is my favorite Halloween look so far this year. I'm always a sucker for something dark and spooky (but you can't go wrong with spoopy either).

Saturday, October 24, 2015

Spoopy Halloween Nails

Spoopy and Creppy Halloween Nails (Trick or Troat)

Much spoopy, so creppy! I did some nails that are perfect for trick or troating this Halloween. Oh, spoopy meme, you're everything that's right with cheaply imported Halloween goods and illiterate people who work in bakeries. 

Trick or Troat

Creppy


Spoopy and Creppy Halloween Nails (Trick or Troat)

These were so much fun to paint! I used quite a few colors, so don't get fritened if this gets a bit long.

Trick or Troat- China Glaze, Home Sweet House Music (orange) with China Glaze, Intelligence, Integrity & Courage and black acrylic paint for the lettering.

Spoopy- Sinful Colors, Black on Black with white acrylic paint for the lettering and Spoiled, Only in Creams for the shading.

Candy Corn- China Glaze, Plur-ple for the base. I drew triangles with white acrylic paint and then colored them in with Home Sweet House Music and Sally Hansen Insta-Dri in Expres-so Yellow.

Creppy- Wet n Wild, Stand the Test of Lime with Plur-ple for the drippy accents.

Smashed Spiders- China Glaze, Intelligence, Integrity & Courage for the base with black acrylic paint for the spiders.

Spoopy and Creppy Halloween Nails (Trick or Troat)

Spoopy


Spoopy and Creppy Halloween Nails (Trick or Troat)

My motto for Halloween this year:

Creppy in the streets spoopy in the sheets
I didn't make this, but whoever did is pretty much awesome.

Monday, October 19, 2015

Blingy Halloween Skulls

Orly Rebel Chic Kit w/ Skull Gems and Studs- Halloween Nails

For my next Halloween look I used the Rebel Chic kit from Orly. This is one of my all time best finds at Sallys. It was marked down to $4.99 already and I got it during the half off clearance sale, so about $2.50 for all of it! Everything in the kit goes so nicely together, although maybe not in as much excess as shown on the package. I've chosen to use just a few elements at a time for a more understated look. You can also check out this other manicure I did earlier with this kit to see another way to wear these elements.

Orly Rebel Chic Kit w/ Skull Gems and Studs- Halloween Nails

I mentioned it in my last post, but I'll say it again. Iron Butterfly, the polish that came in this kit is fantastic. I'm wearing two coats here. The formula is easy to apply and dries super fast. I really like the metallic shimmer with the matte finish. The only drawback is that the wear time is a little less than a typical polish before it starts chipping. I also had a bit of trouble keeping the skull on. The back is curved to help it lay flat on the nail which is great. It lasted about 3 days before it came off (I was being pretty rough with it). After it came off the first time I re-glued it 2 more times to extend the manicure, but it popped off much more quickly when I had to glue it over the residue that was left over from the first time.

Orly Rebel Chic Kit w/ Skull Gems and Studs- Halloween Nails

This is the kind of look I could wear any time of the year. In fact, I did this manicure in June and never got around to posting it until now. This is what I had on for my last day of work at my old job, and it felt so right. I miss everyone there, but I'm so glad I took the risk and moved on.

Orly Rebel Chic Kit w/ Skull Gems and Studs- Halloween Nails

Sunday, October 11, 2015

Wicked Halloween Tips


Nail tips, that is. I hope no one wandered over here hoping for tips about how to Halloween. It's hard enough to get my husband to leave the house for regular social functions.. and ones where he might be required to dress up... not too likely. This is one of my favorite holidays, though. It's all about dressing up and eating candy, possibly (hopefully) while drinking. Even turkey has a hard time topping that. There's also not a lot of pressure to spend time with family which, after moving 10 hours away, is kind of a relief. I already have my costume for this year planned too. It's probably going to be a little offensive to everyone in my office. I can't wait. :) I promise it's nothing too awful. I'll give you a peek once it's closer to being done.


This is one of those rare cases when my right hand (top picture) turned out better than my left. I got the black too high up on the left hand to give the effect of blackened tips.

I started by filing my nails much pointier than I usually do for a more sinister look. I love really sharp stilettos but I don't know how those ladies do it without poking their eye out. I've stabbed myself so many times this week and these aren't even that pointy. It's worth it though. A good artist has to suffer for their art. I used my favorite nude for the base, French Pink from Nina Ultra Pro. Next I sponged on a coppery shade, Zoya's Richelle. I topped that with a sponged black layer, then went back and sponged a little more copper on top in an attempt to blend it better. Afterwards I was wishing I tried all three colors wet on the sponge at once. The gradient wasn't quite as smooth as I wanted it. I still not super great at the gradient nails. Must keep practicing.


 I'm sorry I've been super lazy about posting lately. I have tons of motivation to paint, but very little for editing photos and writing. I'm building up quite a backlog! I'm planning all Halloween nails through the end of the month so you can expect to see a little bit more of me for the next few weeks.