Sunday, May 31, 2015

The Polished Bookworms May: The Bell Jar

The Polished Bookworms May 2015 The Bell Jar by Sylvia Plath

The Polished Bookworms book for May is The Bell Jar by Sylvia Plath. I enjoyed the book quite a bit. The story is semi-autobiographical with the main character experiencing depression and a mental breakdown similar to what Sylvia herself faced. I think knowing that Sylvia went through everything she wrote made the book more special and real for me. I found it very interesting to read about depression from the perspective of someone who doesn't exactly know what she's going through, but is describing all her thoughts and feelings throughout the experience.

I focused on a lot of the little details from the story for my manicure. Each nail represents something described in the book. If you've read it can you guess what any of them are?

The Polished Bookworms May 2015 The Bell Jar by Sylvia Plath

Thumb
"I also have a white plastic sunglasses case with colored shells and sequins and a green plastic starfish sewed onto it."
I used two coats of Sinful Colors, Snow Me White and then dipped my nail in clear glitter for the sequins. I painted on a green starfish with China Glaze, Treble Maker.

Index Finger
"I remember the ceiling over every bathtub I've stretched out in. I remember the tubs too: the antique griffin-legged tubs, and the modern coffin-shaped tubs, and the fancy pink marble tubs over looking indoor lily ponds."
This one is two coats of Orly, Rage covered with nail foil from Dollar Nail Art in Laced Gold to mimic the pink marble finish of Esther's tub.

Middle Finger
"Her first diamond." "Give it to her, Marco." Marco bowed and deposited the stickpin in my palm. It dazzled and danced with light like a heavenly ice cube. I slipped it quickly into my imitation jet bead evening bag and looked around.
I started with two coats of Sinful Colors, Black on Black then stamped with Bundle Monster plate BM-214 to create the beaded bag. I used a rhinestone diamond to top it off.

Ring Finger
"Arrayed on the Ladies' Day banquet table were yellow-green avocado pear halves stuffed with crabmeat and mayonnaise, and platters of rare roast beef and cold chicken, and every so often a cut-glass bowl heaped with black caviar."
I loved that Esther had a ravenous appetite for caviar and ate the whole bowl by herself. I used caviar beads to create this nail and coated them with a black jelly polish to make them look extra squishy and delicious.

Pinkie
"I still have the makeup kit they gave me... [containing] three lipsticks ranging from red to pink, all cased in the same little gilt box with a mirror on the side."
I did a gradient to represent the three lipsticks that came in Esther's makeup case. I used Wet n Wild, Tickled Pink for the base and then sponged on OPI, Hey Baby and China Glaze, Seeing Red.

The Polished Bookworms May 2015 The Bell Jar by Sylvia Plath

I've already seen a few of the manicures for this book and I'm loving them. Check them out here:

Thursday, May 28, 2015

30 Days of Colour: Favorite Brand/Technique

30 Days of Colour Challenge Favorite Brand and Technique Textured Polish Finger Paints Franken Stamping Bundle Monster Iridescent Rhinestones Chevron Peach and Teal Octopus

Can you guess what my favorite technique is? Officially I'm going with skittles, but it's just because I could never decide. The best part of doing my own nails is being able to change them as often as I want and pick whatever design seems fun at the moment. I've got a little of everything here and that's the way I like it! My favorite brand is whatever is in my untried pile at the moment. There's nothing better than using a new polish for the first time. I definitely have some old favorites, but it doesn't stop the itch to collect more.

30 Days of Colour Challenge Favorite Brand and Technique Textured Polish Finger Paints Franken Stamping Bundle Monster Iridescent Rhinestones Chevron Peach and Teal Octopus

This teal color is Tails of Love from the Finger Paints Mermaid Collection. I'm starting to come around on textured polishes and I rather like this one. It's a little bumpy, but I've added top coat to even it out. The finish was shiny already so top coating it didn't take anything away from this polish. The peach is one of my franken creations. I used Bundle Monster plate BM-423 for the chevrons and BM-401 for the octopus with Mundo de Unas white stamping polish. I got the iridescent rhinestones from ebay recently for $1.40 for a pack of 300. Pretty good deal if I say so myself. It came with both white and black rhinestones and I have a ton of ideas for using them. Which is good since there are 296 more.

30 Days of Colour Challenge Favorite Brand and Technique Textured Polish Finger Paints Franken Stamping Bundle Monster Iridescent Rhinestones Chevron Peach and Teal Octopus

Let's see what everyone else has as favorites:


Monday, May 25, 2015

30 Days of Colour: Indie/Freehand

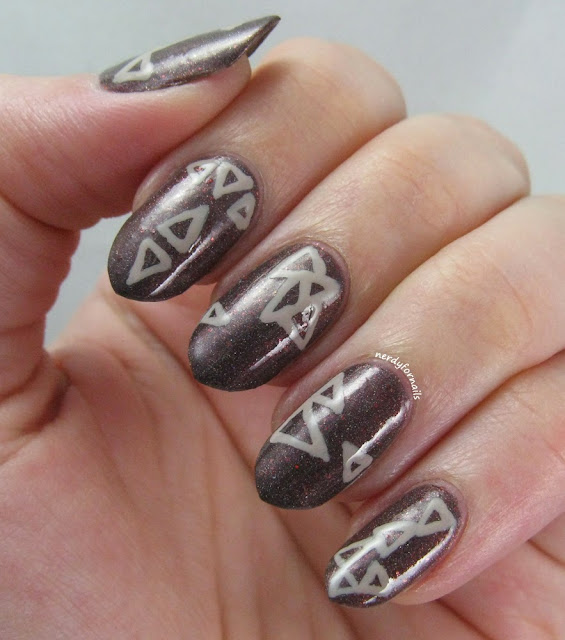
30 Days of Colour Challenge Indie Freehand Period Poops by Emerald & Ash

The 30 Days of Colour challenge is finally nearing the end. This is the 3rd to last prompt and while I've been having a ton of fun, I'm also looking forward to relaxing from what has been a somewhat hectic pace for me. I've gotten into the habit of doing my nails once per week and blogging twice and this has upped both of those considerably. I'm definitely not cut out for those challenges that require a new manicure every day if I'm having a hard time with this one. Today's challenge is indie/freehand. I've been dying to use this polish since I got it back in April. 

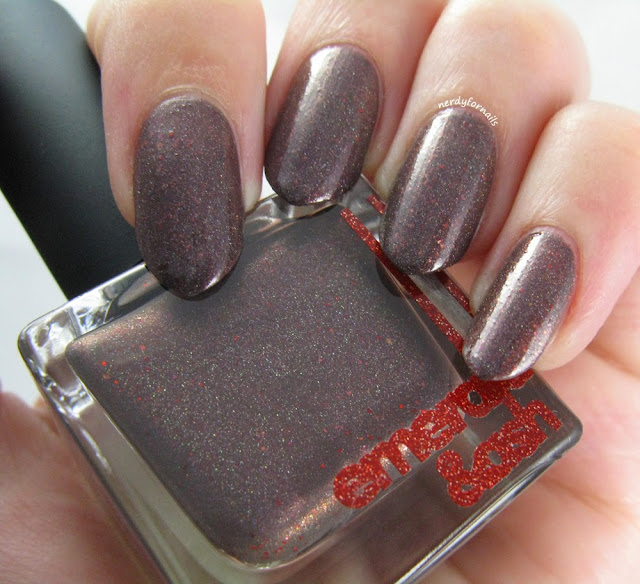
This beautiful polish is Period Poops from Emerald & Ash. They released on on April Fool's Day as a bit of a joke and I couldn't resist. It came with a little tampon made of felt squares (for polish removal) and bottle of chocolate scented cuticle oil that I can't show you because I've taken it to work and have been using it every day. The chocolate really cheers me up when things at work seem dire... you know.. like 5 minutes after I sit down at my desk in the morning. For the freehand portion of this challenge I painted on triangles in random patterns. I used Ulta's Set the Nude and a tiny brush to paint with.

30 Days of Colour Challenge Indie Freehand Period Poops by Emerald & Ash

30 Days of Colour Challenge Indie Freehand Period Poops by Emerald & Ash

Period poops is a rich reddish brown polish with holo sparkles and red flakies. It really pops in the sun! I can't get enough of the square bottle and the cute packaging that everything came in. I also have to say Emerald & Ash has excellent customer service. I made a typo in my address and they fixed it up for me with just one quick email. I'll definitely be placing more orders with them in the future. Their colors are pretty and fun, but it's the creative the names really make these polishes special.

30 Days of Colour Challenge Indie Freehand Period Poops by Emerald & Ash

More indie/freehand manicures here:


Sunday, May 24, 2015

Influenster: Purina ONE Siamese Cat Inspired Nails

Purina One Cat Food Influenster #OneSwitch Siamese

Hello everyone, I'd like you to meet my kitty, Styx. Or as I insist on calling him, Mr Stickers. I recently received the Purina ONE VoxBox from Influenster to review and since I haven't had a taste for cat food since I was a toddler I've enlisted the help of my fur child. This picture pretty much sums up our feelings about Purina ONE, but more on that in a minute. 

First I must somehow bring this back to nails so that I have an excuse to post about it on my nail blog.

Siamese Cat Inspired Nails with Styx the Cat Mr Stickers
Two seconds away from being seriously bitten.
I painted some nails inspired by my kitty. He's a beautiful, gigantic Siamese that we rescued three years ago. He went from about 2 lb to 14 lb over the years so he knows a thing or two about eating cat food.

I wanted to do a gradient to show the transition from dark to light fur that's characteristic of Siamese cats and I threw in a blue nail to match his bright eyes. The blue is two coats of Love & Beauty in Light Blue. For the other nails I started with three coats of Revlon's Sheer Cotton. This polish is pretty sheer as the name suggests so it did take a few coats to be opaque. For the gradient I sponged on Sinful Colors- Black on Black, Spoiled- Pumping Gas, LA Colors- Whipped and Sinful Colors- Snow Me White. Overall it was a pretty good match to Mr Sticker's fur. He was not particularly pleased with the photo shoot though.

Siamese Cat Inspired Nails

And now, on to the cat food. The Purina ONE VoxBox came with a small bag of cat food, a coupon for a full sized bag of cat food and a pamphlet which talks about the benefits of Purina ONE. Here's a small excerpt: "The purposeful nutrition of Purina ONE dry cat foods provides all the nutrition your cat needs and nothing she doesn't."

For the most part that's true. It's actually very similar to the cat food we already feed Styx. I've taken pictures of the ingredient list so you can compare.
Purina One Cat Food Ingredients
Purina ONE cat food ingredients
Iams Cat Food Ingredients
Iams cat food ingredients
 I took this whole cat thing pretty seriously before we adopted Styx and did a ton of research on what cats are supposed to eat. I even considered buying him whole frozen rabbits, but then couldn't afford the heavy duty meat grinder it takes to grind up rabbit bones, so store bought food it was. We also tried several kinds of wet cat food which are supposed to be slightly more healthy than dry, but Styx is a weird kitty and prefers dry food much of the time. I took a lot of care in reading all the labels to pick a food with as many real ingredients and as little filler as possible. Back then Iams was one of the only semi-affordable decent cat foods on the market. A lot of the other cheaper cat food brands have a ton of fillers. Here's the ingredient list from a slightly lower priced competitor:

Ground yellow corn, corn gluten meal, chicken by-product meal, meat and bone meal, soybean meal, beef tallow preserved with mixed-tocopherols (form of Vitamin E), turkey by-product meal, powdered cellulose, animal liver flavor, soybean hulls, malt extract, phosphoric acid, calcium carbonate, salt, choline chloride, potassium chloride, dried cheese powder, parsley flakes, added color, taurine, zinc sulfate, Vitamin E supplement, ferrous sulfate, Yellow 6, manganese sulfate, niacin, Yellow 5, Red 40, Vitamin A supplement, calcium pantothenate, thiamine mononitrate, Blue 2, copper sulfate, riboflavin supplement, Vitamin B-12 supplement, pyridoxine hydrochloride, folic acid, Vitamin D-3 supplement, calcium iodate, biotin, menadione sodium bisulfite complex (source of Vitamin K activity), sodium selenite. E-6002

Notice how the Iams and Purina both have chicken listed as the first ingredient while this other brand only uses chicken by-product and it's the third ingredient?

It's nice that Purina now offers a second healthy option for cat food, but for now we'll be sticking with Iams. I do think that Iams has ever so slightly better ingredients, but the issue is bigger than that. You see, Mr Stickers has had some health issues this past year. He somehow got giardia which is a super not fun parasite that causes diarrhea like lava flows. We took him to the vet countless times and had lots of expensive tests and medications before they determined that the giardia had turned into a rare form of botulism in his intestines and finally prescribed a medicine that worked. Somewhat. It's still a little touch and go these days. 

My husband really didn't want me to feed Styx this new food because of the trouble we've been having with his bowels. But the husband was out of town camping this weekend so I thought, what could it hurt? Styx did enjoy the food and ate it all up. I put one scoop of his regular food and one scoop of the Purina and as recommended since it's pretty common for a cat to have digestion troubles when switching foods. Our kitty is extra sensitive and the results were not pretty. For his sake (and mine) I think we have to stick with his regular food for the foreseeable future. I don't think my husband reads my blog so hopefully my secret is safe with you guys. 

 My overall impressions: Purina ONE is a good option when it comes to feeding your cat a healthier diet. It's not the only brand out there and I'd also recommend Iams or some of the other "gourmet" brands like Blue Buffalo if you're feeling rich. Do your own research so you can feel good about what you're feeding your pets.

Siamese Cat Styx Mr Stickers
Mr Stickers has mastered the glare of death

Friday, May 22, 2015

30 Days of Colour: Creme/Color Blocking


Ok, let me be honest with you. This manicure was a huge pain. I wasn't very excited to begin with for today's challenge. You'd think color blocking would be my thing, but no, not really. I wanted to do this one "really quickly" which quickly turned into 11:30 at night. I'm over it. But I did get a compliment at work so that was nice. Do you ever feel like the nails you feel meh about get the best response from other people? The nails I love the most get hardly any likes. I have a weird sense of style.

I had some trouble getting these to work right. I started with a base color of Intelligence, Integrity, & Courage from the Giver collection by China Glaze. It's a nice soft grey which is pretty much my favorite color besides purple. I painted rectangles of polish onto wax paper in hopes that they'd peel off so I could cut them up for my color blocking. They did not. I started over with a silicone mat and had much better luck. For each of my rectangles I used two coats of polish and then fast dry top coat to help them peel up more easily. I placed the rectangles onto bits of wax paper to give them more substance to cut through and then cut out tons of little triangles.

Colors used:
China Glaze- Queen B (dark purple)
China Glaze- Seeing Red (green.. just kidding. red)
Sinful Colors- Calypso (dark teal)
Sinful Colors- Endless Blue (royal blue)
Sinful Colors- Unicorn (pale yellow)
Milani Neon- Fresh Teal (teal)
Orly- You're Blushing (pinkish beige)

I used base coat to stick the triangles in random patterns to my nails and there ya go. Color blocking with slightly drab colors. It turned out pretty ok. 


More color blocking manicures here:


Wednesday, May 20, 2015

30 Days of Colour: Matte/Stamping

30 Days of Colour Challenge Matte with Stamping Bundle Monster Mentality Matriarch

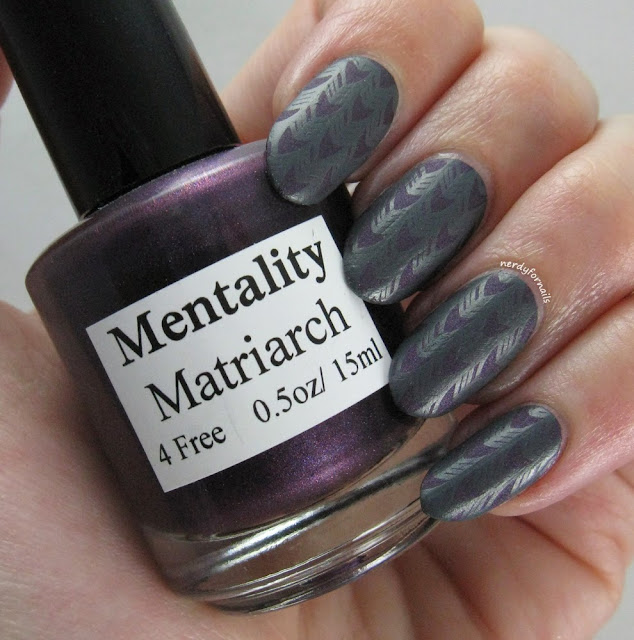
I'm a day late on this one, but here's my matte/stamping manicure for the 30 Days of Colour challenge. I ended up being out of the house all last weekend so I didn't get a chance to paint this one until last night and I was too sleepy to post. Plus I needed to read a few more chapters of my book for this month's Polished Bookworms book club manicure. I might have taken on too much nail-wise this month, but I'm loving it.

I used one of my favorite matte polishes- Mentality's Matriarch. It's so velvety! I stamped with Mundo de Unas grey stamping polish and Bundle Monster plate BM-410. This image reminds me of fish heads/skeletons which makes me think of of this brilliant song:


Trust me.. you need to watch it (but you can, skip to 2:16 if you have a short attention span).

30 Days of Colour Challenge Matte with Stamping Bundle Monster Mentality Matriarch

I was impatient to get into bed and didn't want to wait for the matte polish to dry so I went ahead with my Sally Hansen Dries Instantly top coat. I thought y'all might want to see what it looked like shiny'd up. I think I liked it better matte which makes sense because that's how the polish was meant to be, but it does have a nice shimmer with the top coat.

30 Days of Colour Challenge Matte with Stamping Bundle Monster Mentality Matriarch

For your viewing pleasure- more matte/stamping manicures:


Sunday, May 17, 2015

30 Days of Colour: Holo Watermarble

30 Days of Colour Challenge Holo Water Marble Color Club Halo Hues

30 Days of Colour Challenge Holo Water Marble Color Club Halo Hues

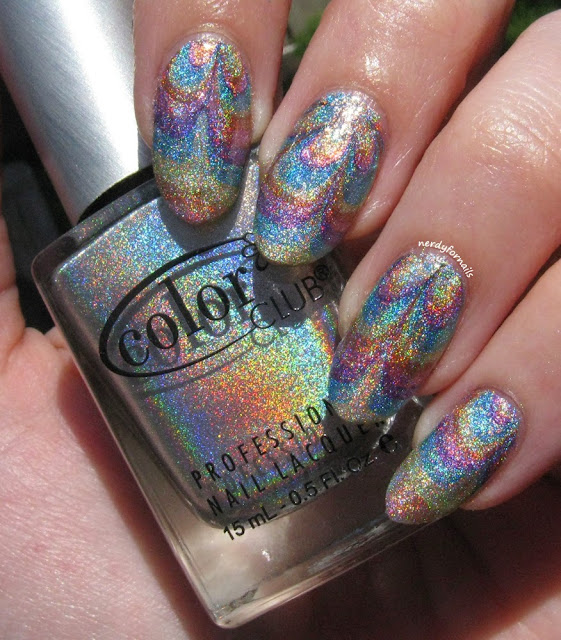
It looks like such and innocent manicure until you get out into the sun and then BAM! I was having some trouble photographing this one because of the extreme level of holo-ness. 

Today's theme for the 30 Days of Colour challenge is holo/water marble. It was my first time water marbling with holo polishes. They spread really well which means the marble is sheer so you'll definitely need a good base coat if you want to try this.

30 Days of Colour Challenge Holo Water Marble Color Club Halo Hues

30 Days of Colour Challenge Holo Water Marble Color Club Halo Hues

 I used polishes from the Color Club Halo Hues collection. Technically what I did is a dry water marble or water marble decal technique where you let the marble dry on the water and then stick it to your nails. I've heard it called both things, but I haven't decided which one I like better. My next post will be a tutorial on this technique so if you're interested check back for that. 

Colors used in rainbow order: Miss Bliss, Cosmic Fate, Kismet, Over the Moon, and Eternal Beauty. I used the silver holo, Harp On It as my base color. Wow. That's pretty much all I have left to say.

30 Days of Colour Challenge Holo Water Marble Color Club Halo Hues

Let's see what everyone else did for holo/water marble day:


Wednesday, May 13, 2015

30 Days of Colour: Glitter/Animal Print

30 Days of Colour Glitter Animal Print Leopard Glitter Placement

Today marks the almost half way point in the challenge and it's been so much fun. I've been pushing myself to try a lot of new things and come up with even crazier ideas. Like this one! The prompt today is glitter/animal print so the logical thing to do was make animal print out of glitter. It turned out really interesting and I can't say I've seen anything quite like it. My coworker says it reminds her of a bad 80's blingy sweatshirt that has too many rhinestones. Yay! I'm doing something right!

30 Days of Colour Glitter Animal Print Leopard Glitter Placement

I started out with two coats of LA Colors, Deluxe for the base. Next I added a coat of Sally Hansen Complete Salon Manicure in Golden Rule (fine gold glitter). Then because it needed more glitter I added a coat of Runway Angel from Victoria's Secret which has fine gold glitter mixed with larger hex glitters. For my leopard print I used some black craft glitter that I got at Michaels and stuck them on one at a time with a toothpick. 

Can we make this a thing? I want to do all my leopard prints with glitter from now on!

30 Days of Colour Glitter Animal Print Leopard Glitter Placement

Click on to see more glitter/animal print manicures:


Sunday, May 10, 2015

30 Days of Colour: White/Leadlighting

30 Days of Colour Challenge White Leadlighting Leadlight sheer polish over stamping

One thing I love about challenges is that they push me to try new techniques. I've always meant to try this one out, but never got around to it. Lead lighting is an even simpler version of the decal technique. You don't have to worry about coloring in the lines as much since the polish is sheer and doesn't show over the black stamping outlines. It also looks super pretty when the colors fade into each other and the variation on each nail ends up looking purposeful and interesting.

30 Days of Colour Challenge White Leadlighting Leadlight sheer polish over stamping

I made up a batch of sheer polishes for the purpose of lead lighting months ago and then put them away and kind of forgot about them. Making this kind of sheer polishes seems pretty fool proof. I mixed both jellies and/or cremes into clear polish and shook them up to make a whole rainbow. After trying them all I think some of my colors are just a bit too sheer (I'm looking at you yellow and orange), but that could be easily fixed by adding a few more drops of color to the mixtures.

30 Days of Colour Challenge White Leadlighting Leadlight sheer polish over stamping

I read somewhere that a dotting tool is useful for this technique so that's what I tried. The theory is that a brush might mess up the stamping lines more easily since you'd be brushing over the stamping. With the dotter you just float the polish over the surface without touching the metal to your nail so that makes sense. I used Bundle Monster plate BM-618 and Mundo du Unas stamping polish.

30 Days of Colour Challenge White Leadlighting Leadlight sheer polish over stamping

Here's a close-up of the finished nails. I love how the pretty pastel colors make it look like stained glass flowers.

Can't wait to see what everyone else came up with today.


Thursday, May 7, 2015

30 Days of Colour: Green/Gradient

30 Days of Colour Green Gradient China Glaze Electric Nights

Arrrgh.. gradients! I still haven't mastered them. I wish I could have gotten these to blend a little better because I love the color combination. Today's theme for the 30 Days of Colour challenge is green/gradient, so I've done a gradient that has some green in it. I don't have very many green polishes and I didn't like any of them enough together to try a green only gradient, so green accents it is. What is the secret to a perfectly smooth gradient? If you know please share! I sponged over these 3-4 times on each finger and I feel like it's still patchy and blocky looking. Should I just keep sponging? How many times do you usually go over each nail? I must keep practicing!

30 Days of Colour Green Gradient China Glaze Electric Nights

I used polishes from the China Glaze Electric Nights collection for this gradient: Violet Vibes, DJ Blue My Mind, Treble Maker, and Daisy Know My Name? This collection can do no wrong. Even with my poor gradient skills I've gotten a ton of compliments on these. Probably more than any other manicure in the history of my nails. I can't stop staring at them. Soooo pretty.

30 Days of Colour Green Gradient China Glaze Electric Nights

Let's see what other delightful green/gradient creations the other ladies have for us today.


Monday, May 4, 2015

30 Days of Colour: Purple/Dry Brush

30 Days of Colour Challenge Purple Dry Brush Milani Texture


Day two of the challenge is Purple/Dry Brush. I have more purples in my collection than any other color so this one was more challenging for me. I have way too many polishes to choose from easily. I finally settled on this textured polish from Milani because I haven't used it before and I thought the texture would make the dry brush technique a little more interesting. 

This polish, Lovely Lavender from Milani, is a true one-coater. The first coat covered so well, I didn't even bother adding a second. If texture polishes are your thing this one is pretty awesome. I found them on sale for under a dollar each so I picked up two other Milani textures that are also shades of purple. Now I'm a bit more excited to try them. I've used a few other textured polishes and wasn't fan, but the application on this one was so easy and it dried really fast. The removal was a piece of cake too. I expected it to be really rough and gritty, but it wiped off easily and I didn't even feel like I was sand-papering my nails.

For the dry brush technique you wipe most of the polish off the brush and then apply it in splotchy streaks over your base color. I used Queen B from China Glaze. This dark purple is one of my favorite shades and I think it goes pretty well with the lavender. I love how the tops of the texture bumps picked up the dark polish all over and then I really had to smush the brush in to get the darker splotches. It gives it a really neat distressed look.

30 Days of Colour Challenge Purple Dry Brush Milani Texture

I have to admit, as much as I loved working with this polish (and it looks so cool) it just doesn't feel right! Every time I touched it against my face or my other fingers I couldn't stand it. I know it totally defeats the purpose of a texture, but next time I'll have to top coat it.

See more lovely purple/dry brush manicures here:


Saturday, May 2, 2015

30 Days of Colour Challenge: Gold/Dotticure


I'm a little shocked that I've decided to join a challenge. I'm part of a few great challenge groups already and I've been sitting them out because I haven't been feeling it. Even the easy ones seem like such a big commitment lately and I've been having a good time posting whatever my crazy brain thinks up. For some reason this challenge just clicked. Most of all, I like that it pairs up a color with a technique. It gives a bit more direction while still leaving a ton of room for creativity. I'm starting a day late, but it seems like a nice laid back challenge which is also really nice. Fingers crossed I'll have enough energy to complete everything. 

This challenge is the creation of Katherine of ProcrastiNails. You can read more about it here and join in if you'd like. I love Katherine's blog and can't wait to see what everyone comes up with.

30 Days of Colour Challange Gold Dotticure Sally Hansen Color Foil Liquid Gold

The prompt for today is Gold/Dotticure. I've combined both in this negative space manicure. I sponged on a gradient leaving the top part of my nails bare with Sally Hansen Color Foil in Liquid Gold. I used two different sizes of dotting tools to make large and small dots with Liquid Gold and Maybelline Color Show, Bold Gold. I really like how the two tones of gold look together.

30 Days of Colour Challange Gold Dotticure Sally Hansen Color Foil Liquid Gold

30 Days of Colour Challange Gold Dotticure Sally Hansen Color Foil Liquid Gold

This one kind of reminds me of champagne. It's a very fizzy, bubbly kind of manicure.

See more of today's theme here: