Tuesday, June 30, 2015

The Polished Bookworms June: The Giver

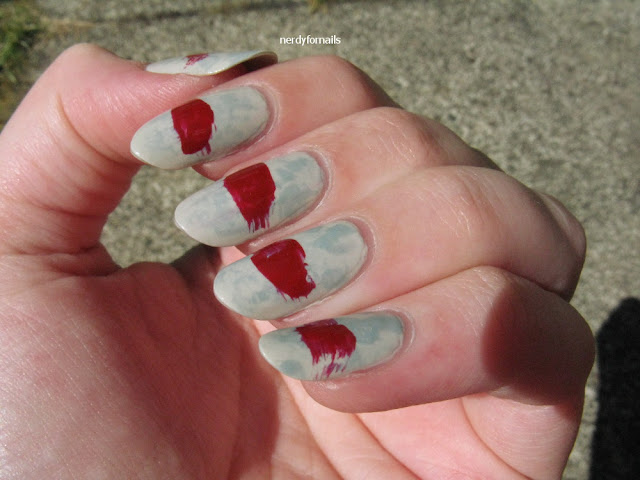
Polished Bookworms Book for June The Giver Lois Lowry Seeing Red The Giver Collection China Glaze

Blargh! Day two of the job search is going well enough. Day one of blogging on the laptop... not so much. I have Photoshop on my desktop, but not on my desperately old and slow laptop, so I've been attempting to make due with GIMP and outdoor lighting, but these things are not my favorite. If you missed my last post here's the short version: I quit my job, packed up the car and drove for 10 hours to Oregon where I'm hoping to relocate. I'm sorry if things are a bit messy here on the blog until I can get back to my normal setup or at least find something a little less infuriating than GIMP.

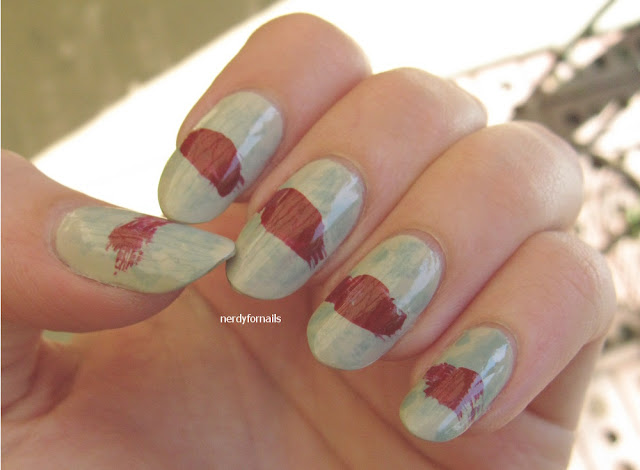
Soooo...enough about me. What's going on with these nails?? It's book club time again! June's book for The Polished Bookworms is The Giver by Lois Lowry. I've used three polishes from The Giver collection that China Glaze put out around the time of the movie release. In the book the world everyone lives in is monochromatic and the first color Jonas sees is red. I made a splotchy grey background and added big swipes of red to represent how the color kind of breaks into his life.

The red polish is appropriately named Seeing Red. My base color is a pale grey called Five Rules and the darker color which I stippled on with a mostly dry brush is Intelligence, Integrity & Courage.

Polished Bookworms Book for June The Giver Lois Lowry Seeing Red The Giver Collection China Glaze

I only had enough patience to edit two photos. Sorry! If you have any recommendations for free photo editing programs that are good let me know!

In the meantime, let's see what the other ladies painted for The Giver.


Saturday, June 27, 2015

Sally Hansen Pearl Crush: Oy-ster it Up!

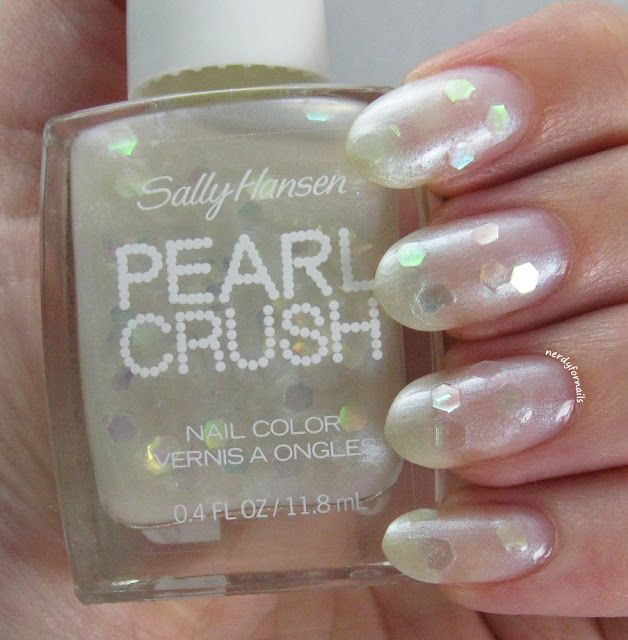
Sally Hansen Pearl Crush Oy-Ster It Up! Swatch

Exciting news, I think. I've quit my job and am headed to Oregon to find a new one (hopefully quickly). It's slightly terrifying to be unemployed for the first time in ten years, but I'm also happy to be finally doing what I've dreamed of for the last fifteen. I've always loved the greener states above the enormous soul crushing oven that is CA. It's just too bad I'm taking the heat wave with me. 

Since I'm crossing my fingers for tons of interviews I'll be doing some super boring job hunt appropriate nails to post in the coming weeks. As much as I know you all want to see tons of subdued manicures right in the middle of summer, send some good vibes my way for finding gainful employment ASAP. 

Sally Hansen Pearl Crush Oy-Ster It Up! Swatch

This is the second Sally Hansen Pearl Crush polish I have to show you. I received both as samples for review. I love the look of these polishes. The ginormous glitters and shimmery finish just work for me.  While I found the formula on Clam Digger (the purple/black shade I swatched earlier) to be quite nice and easy to work with, this one, Oy-ster it Up!, was a bit more tricky. I found myself really having to fish to get the glitters out. The base was still a nice consistency, but I had to use 3 coats (vs 1 of the other shade) to get the glitter coverage I wanted. 

This pink shimmery shade is really delicate and pretty and I felt very girly wearing it. I think it could possibly even pass for an interview polish until the iridescent glitters catch the light. It is a bit sheer. I don't mind seeing the nail line, but if you do there are so many options for base colors. 

Sally Hansen Pearl Crush Oy-Ster It Up! Swatch


Thursday, June 18, 2015

NYC Glitter-splosion Water Marble

NYC Glitter Nail Polish Water Marble NY Princess

Hello there again nail friends. Today I have another review for you. I was sent these polishes as a press sample and what better way to try them all at once than to attempt a water marble. I've never done one with glitter polish before so I wasn't sure how it would turn out. I'd say it was a success.

You can't see it in the pictures because top coat is clear, but I really wanted to try out the NYC top coat, Grand Central Station. I've heard a lot of good things about it, but at $1.99 could it really be as good as my current top coat?

NYC Glitter Nail Polish Water Marble NY Princess

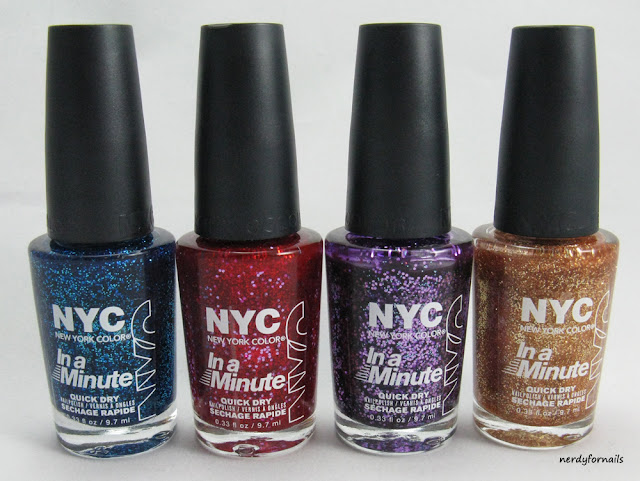
These are the polishes I used in my marble (L-R)- Sea of Diamonds, Ruby Slippers, NY Princess and Fashion Queen. The first three colors have a nice jelly base with different sized glitters in the same color as the jelly. I like that the jelly is fairly opaque because it helps the glitter appear to give fuller coverage in two coats. The gold polish is a denser micro glitter with some slightly larger particles mixed in.

NYC Glitter Nail Polish Water Marble NY Princess

Here's a close-up of the best marbled nail and the purple polish, NY Princess. I'm loving the different sized glitters mixed throughout. I used the gold polish as a base for my marble which I think kind of washed out the colors in my ring finger where the polish was less thick for the marble. I used the decal method, but marbling with glitter is tricky for me so not all the sections came out perfectly.

Now, about the top coat. I went in feeling a bit skeptical. My go-to top coat, Sally Hansen Dries Instantly, is about $6 and dries super quickly and has a hard finish to prevent dents. I wasn't expecting the NYC quick dry to be quite as good at $2, but I was pleasantly surprised. I whacked a nail pretty hard on my desk 5-10 minutes after top coat application and I got a slight dent in the surface that I was easily able to smooth out. I've had plenty of moments of dread where I check my polish after a bump only to find the layers peeled back, especially using some of the less effective fast dry top coats. I've used Grand Central Station for a couple of manicures so far and I'm really happy with it. I'm still curious to see how it will behave when I get to the bottom half of the bottle. I have a lot of trouble with my SH getting goopy and leaving a lot of bubbles when it gets old. Since NYC dried about the same in time and hardness I think I'll be making the switch if it means I can save $4 on a product that I use A LOT of.

NYC Glitter Nail Polish Water Marble NY Princess

Once I've gotten through a full bottle of the NYC top coat I'll do a follow up review to tell how it stacks up against a few of the others I've tried. If you've tried it before what do you think?

Monday, June 15, 2015

Sally Hansen Pearl Crush- Clam Digger

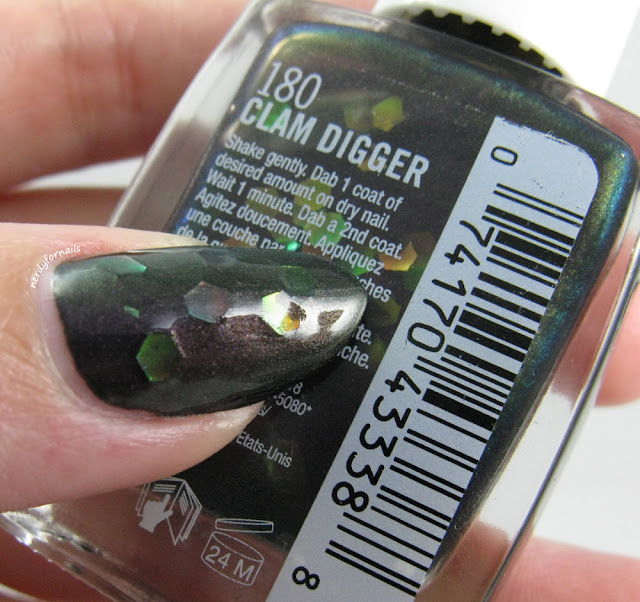
Sally Hansen Pearl Crush Clam Digger Swatch


Today I've got one of the new Pearl Crush polishes from Sally Hansen to show you. This one is called Clam Digger. I received this polish as a sample for review purposes. I shall let you know what I honestly thought of it in a moment, but first a story! I almost declined this round of samples as I'm likely going to be more busy than I'd prefer over the next month or so. What pushed me over the edge was reading a bad review of the Pearl Crush polishes. Of course everyone is entitled to their own opinion and I completely respect that this polish isn't for everyone, but I was already convinced by the pictures I'd seen that these polishes were going to be fantastic and I had to find out for myself. I guess I set out expecting to like them because just look at those enormous hexes! I was drooling over it already before it ever arrived in the mail. Did it live up to my expectations? Read on to find out...

Sally Hansen Pearl Crush Clam Digger Swatch

Yes!

Sally Hansen Pearl Crush Clam Digger Swatch

Ok, you probably want more details. The main complaint I read about this polish is about the frosty finish. It is frosty/shimmery and I feel like that would be a lot more obvious if the polish was worn on its own. I thought Clam Digger needed a dark base color to show off its full potential so I have one coat of black polish on underneath. On top of that I have one coat of Clam Digger. The glitter payoff was good enough that I didn't feel it was necessary to do a second coat, but you would probably want to if you didn't use a base color. I did the dabbing method as suggested on the bottle to get the glitters into place, but I had no problem getting them out of the bottle. I didn't feel that the base was too thick or goopy in comparison to the glitter ratio either. These large hexes are a very thin iridescent mylar material and they lay pretty flat on the nail. I added one layer of top coat and wasn't snagging on anything even though they look like they're coming off the nail. They're just that shiny. 

You can see just a hint of purple shimmer in my pictures, but it was much more noticeable in real life. The base has a subtle shift from purple to a golden green shade that matches the hexes. I bet this polish would look lovely with a purple base to pick up more of those colors. Even though it's a bit frosty I didn't have any trouble with brush strokes as you can see.

Sally Hansen Pearl Crush Clam Digger Swatch

I got two colors to try so when I review the next one I'll use it without a base so you can get an idea of how these polishes behave on their own.

What do you think about this one? Is it something you'd like to have in your own collection? There are 8 colors total and they retail at around $5.99. I've seen them at Target so far and they should also be available at other major drugstores.

Tuesday, June 9, 2015

Toesday: Water Marble Pedicure Fail


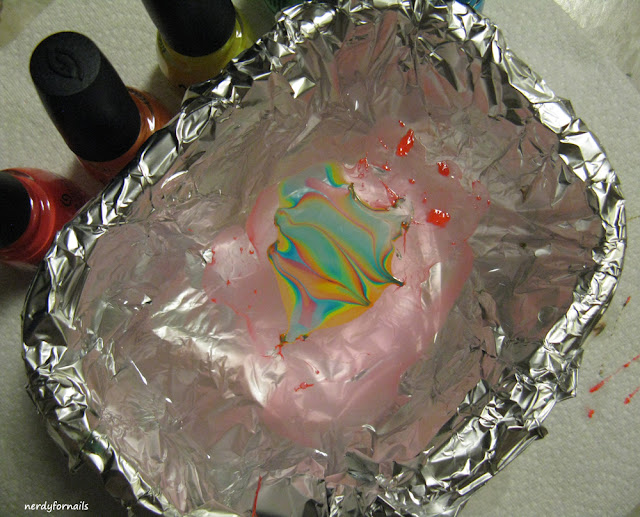
What could be harder than successfully pulling off a water marble manicure? Trying to do it on your toes! One of my nail groups was discussing this picture today (not sure who it originally belongs to, sorry). I think we pretty much all agreed that attempting to water marble toes is an unmitigated disaster. I'd better try it!

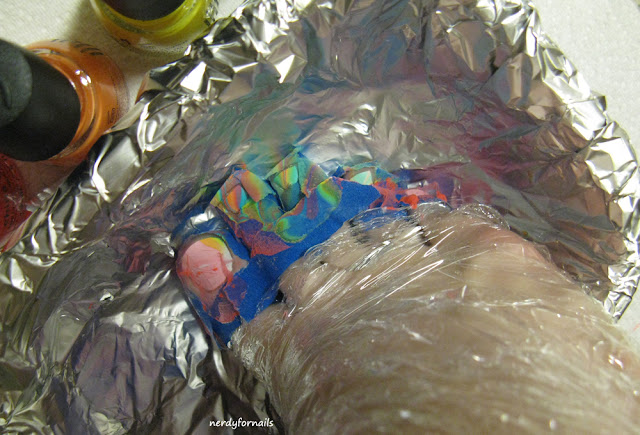
Here I am attempting to be smart by wrapping my foot in saran wrap and taping off all my toes. I've lined my container with foil so as not to ruin it completely with polish.

Water Marble Pedicure Nail Fail

 It's really hard to get the marble to spread far enough to fit all the toes at once. It doesn't help that it's a million degrees here already and the AC kept kicking on and drying out my marble.

Water Marble Pedicure Nail Fail

The dip was... successful? ish.

Water Marble Pedicure Nail Fail

My left foot is super scared right now. I decided to dip this one without protection in the name of experimentation/science.

Water Marble Pedicure Nail Fail

Here are both feet before cleanup. That's a lot of polish on my skin... and in between the toes. It was really sticky.

Water Marble Pedicure Nail Fail

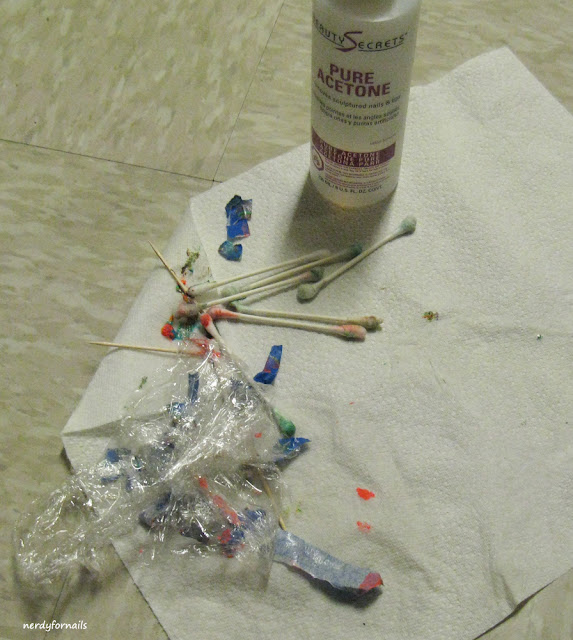
Here's the aftermath. I really thought there'd be more q-tips. 

Water Marble Pedicure Nail Fail

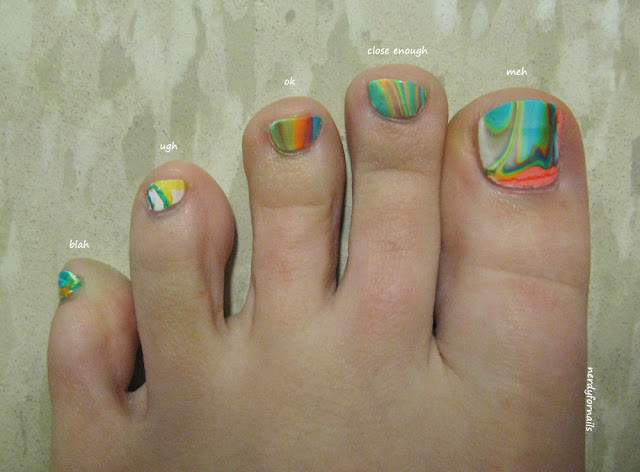
Below we have the finished product. Some toes turned out better than others. It's really hard to get a good large marble in the first place and then dipping the toes at the correct angle all at once... yeesh.

Water Marble Pedicure Nail Fail

Water Marble Pedicure Nail Fail

My number one tip for anyone who wants to try this: don't! Totally not worth it. But if you're like me and you're going to do it anyway, definitely tape off those toes. The polish got almost completely on the tape and it didn't require too much clean up at all. If you really want marbled toes the decal method is the way to go.

Water Marble Pedicure Nail Fail

I had a lot of fun experimenting with what I knew would turn out to be a fail. Sometimes it's nice to do something with no pressure to be perfect at all. If you have any more definite fails you'd like to see me try let me know!

Saturday, June 6, 2015

Water Marble Decal Tutorial

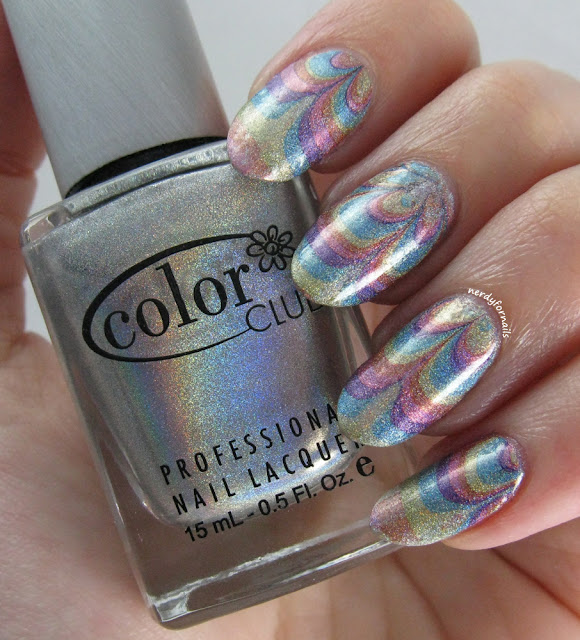
Water Marble Decal Tutorial- Color Club Halo Hues Collection

I love the look of water marble nails, but they can be pretty tricky to do right and it's excessively messy. I hate having to tape off all my fingers and then wish on a thousand stars that I dip them right the first time and won't have to start all over. I've recently been playing around with water marble decals and I love it. This method is so much easier and much less messy. I've put together a quick tutorial to show you how it's done.

Water Marble Decal Tutorial- Color Club Halo Hues Collection

Start by prepping your work area. You'll need a cup of water (I use room temperature filtered water). You'll also need to open all your polishes and arrange them around the cup so they're ready to go. Drop the polish quickly so it doesn't dry before you're ready to make the design.

Water Marble Decal Tutorial- Color Club Halo Hues Collection

Create your bulls-eye by dropping polish just above the surface of the water. You may need to help the bulls-eye spread by running a toothpick around the outer ring. Be careful not to touch the polish at this point or it may start to pull apart. 

I've used polishes from the Color Club Halo Hues collection for this water marble. Newer bottles of thin polish tend to work the best for marbling since they spread more easily. If your polish isn't spreading you may want to try a different kind. Some polishes just don't work well so try a bunch until you find good ones.

Water Marble Decal Tutorial- Color Club Halo Hues Collection

After you've finished your bulls-eye quickly use a toothpick to draw a design. Don't start at your outer most ring since that one is almost completely dry by now. Starting at the 2nd or 3rd ring drag the toothpick through the polish to create your design. Once the design is to your liking leave the disc of polish to dry in the water for at least 30 minutes. I usually make 2-3 marbles at a time so I'll have enough to cover all my nails.

Water Marble Decal Tutorial- Color Club Halo Hues Collection

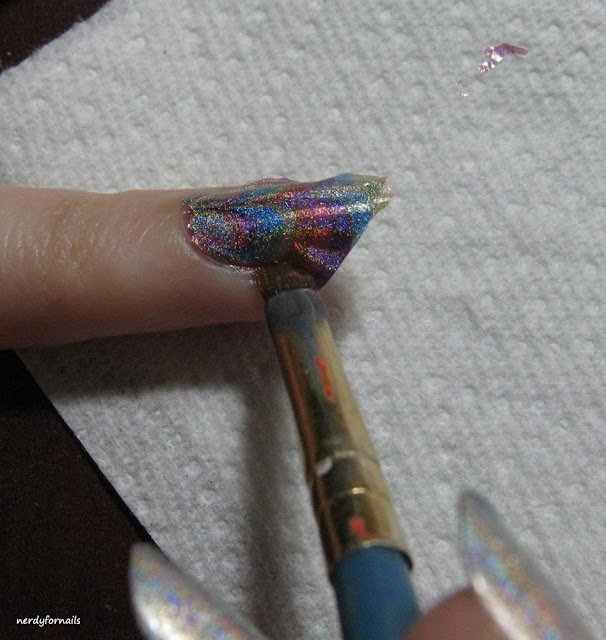
Once it's dry use a toothpick or other small tool to pry the edges away from the cup and gently lift it out onto a paper towel. Be careful not to let it fold or stick onto itself. Gently pat your decal dry and it's ready to work with. The holo polishes are a little thinner and more fragile than regular creme polishes and this decal developed some holes. I just worked around those when I was sticking it to my nails. The decals tend to dry out and become brittle the longer they sit so it's best to use them right away.

Water Marble Decal Tutorial- Color Club Halo Hues Collection

The great thing about water marble decals is being able to position and re-position them exactly where you want. With traditional water marble once you dip your finger(s) you have to skim away the excess polish. With the decals you can also use almost the entire disc since you can cut it apart to use the bits of the design you want. Press the decal down to make it stick. You may need to add a very thin layer of base coat to get it to adhere well. If the polish underneath is too wet it can cause the decal to tear or smear so it's best if your layer underneath is only a little tacky.

You'll want to have the right base color to make your marble pop just like you would with a regular water marble. White is normally the best for creme polishes since it makes the colors appear brighter. For this one I used Harp On It, a silver holo which was perfect for letting the holo marble really sparkle.

Water Marble Decal Tutorial- Color Club Halo Hues Collection

Once I have the decal positioned on my nail I use a pair of small scissors to cut away the excess.

Water Marble Decal Tutorial- Color Club Halo Hues Collection

Use a clean-up brush dipped in acetone to melt away the last excess bits of the decal and clean up the edges. Apply top coat and you're all done!

Water Marble Decal Tutorial- Color Club Halo Hues Collection

This is a game changer for me. It gives the same beautiful results as a regular water marble and I find it to be so much easier. If you've hated water marbling in the past do you think this technique makes it easy enough to do on a regular basis?

Monday, June 1, 2015

30 Days of Colour: Blogger's Choice- Vertical Neon Gradient

China Glaze Electric Nights Collection Vertical Gradient Neon

Today's post brings the 30 Days of Colour Challenge to a close. I'm a day late because my book club manicure was "due" on the same day and I didn't want to overwhelm anyone (myself) by posting twice in the same day. The last day of the challenge is blogger's choice so I'm posting this one that I painted a while back. I love this manicure and I've been waiting so long to post it since it didn't fit in with any of the prompts very well. I've done several other manicures using the Electric Nights collection from China Glaze like my other neon gradient and this water marble pedicure, the blobicure and the water marble nails to match the pedicure. I have a feeling I'm not quite done with these polishes yet either. I may or may not have another pedicure that I already did (to match the blobicure nails) and then I stamped over this one... I'm so addicted to these bright colors that I can't stop using them.


China Glaze Electric Nights Collection Vertical Gradient Neon

I'm still not really great at gradients but practice makes perfect. I think I've been improving somewhat. From purple to red here are the colors I used: Plur-ple, UV Meant To Be, Treble Maker, Daisy Know My Name?, Home Sweet House Music and Red-y To Rave.

China Glaze Electric Nights Collection Vertical Gradient Neon

Is there anything these polishes can't do? I've tried so many different manicures, but if there's anything else you'd like to see let me know!

And don't forget to check out what all the other bloggers chose for their last manicure: