Showing posts with label black. Show all posts

Sunday, May 8, 2016

Chevron Negative Space Nails

Chevron Negative Space Nails

The idea for these nails popped into my head randomly last weekend and I decided to go with it. I know it's supposed to be spring but I've been craving grey and black polish lately. Seasons can't define my nail looks! I really love how the negative space nail came out and wish I had done all my nails this way instead of these crazy skittles. What do you think of this mismatched look?

Polishes/supplies used: 
Essence, As Long As You Love Me
Sinful Colors, Black On Black
Chevron Nail Vinyls

Chevron Negative Space Nails

Saturday, April 2, 2016

April 1- International Tatting Day Nails

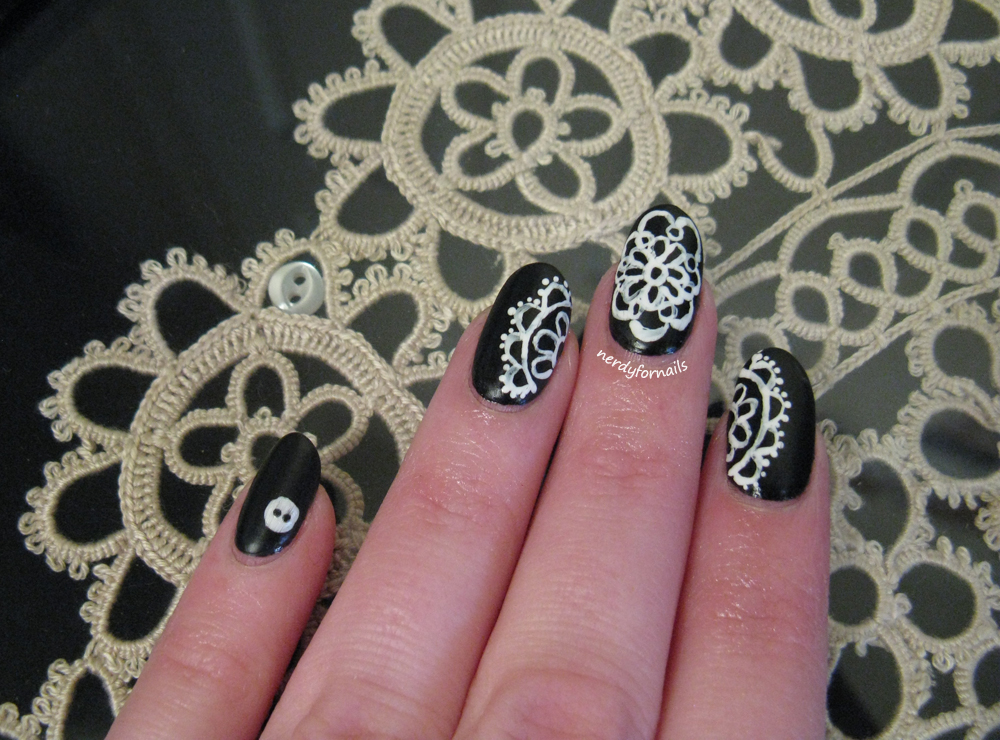
International Tatting Day Tatted Nails April 1

I know, I'm a day late, but I couldn't resist painting some nails for International Tatting Day. Katherine of Procrastinails has put together a really interesting challenge for April. The challenge prompt each day is inspired by a unique holiday during the month of April. If you'd like to join check out the 30 Days of Colour group on Facebook and jump in any time.

30 Days of Colour April 2016 Unique Holidays Challenge

A few years back my grandma found some awesome framed tatting pieces at an estate sale that she thought would be perfect in my apartment. My grandma is hands down the best curator of interesting antiques and home decor, and she was right. I love these tatting pieces. Wikipedia seems ignorant of this fact, but grandma says that each framed piece has to have a button hidden somewhere within the lace. Both pieces she gave me have a tiny hidden button, so there has to be some truth to it. I painted a "hidden" button to go with my tatting nails so they could match.

International Tatting Day Tatted Nails April 1

Framed Tatting

 I have another smaller piece that's buried somewhere after the move, but couldn't be bothered to find it. When these pieces came to me they had glossy brown frames and 70's-tastic brown velvet backing. I fixed them up with some new fabric and a can of spray paint to make them a bit more modern and they hung on my wall through three different apartments before we came here. The move was a little overwhelming so not everything got unpacked, but I'm excited to take them out someday and give them their proper place on my wall.

For my nails I used Sinful Colors Black on Black and free handed a design similar to my tatting piece with white acrylic paint. I topped it off with a coat of Wet n Wild Matte Top Coat.

International Tatting Day Tatted Nails April 1


Sunday, February 7, 2016

Birthday Skittlette with Swarovski Crystals

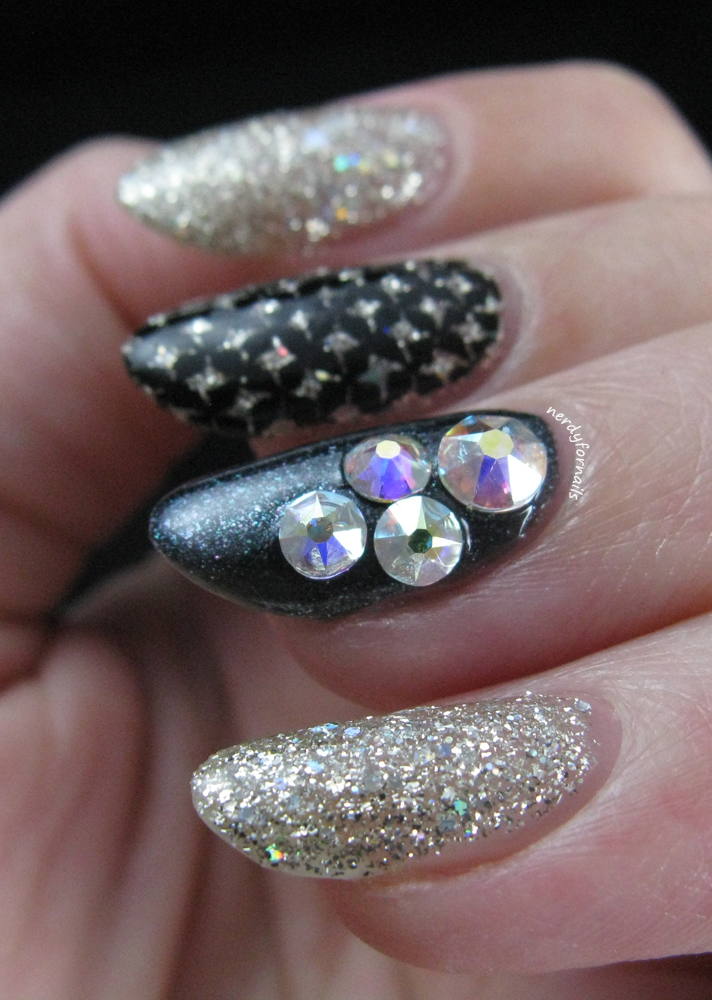
Birthday Nails with Swarovski Crystals, Zoya Cosmo and Stamping

Happy birthday to me... a couple months ago. I painted these back in December and never got around to posting them. I try to do something that feels like "me" every year. This year (and by that I mean 2015) seems to be a hybrid of the nails I did in 2013 and 2014. It's funny that two years ago I was clearly wishing for pointy nails, but still too scared to try it. I'm glad I've branched out since then. I love trying new things, but it's interesting to see that I still gravitate back to the styles and colors I like the most.

Birthday Nails with Swarovski Crystals, Zoya Cosmo and Stamping

Birthday Nails with Swarovski Crystals, Zoya Cosmo and Stamping

I think skittle or skittlette nails will always be one of my favorite things. It's hard to pick just one color, so I'll take any excuse to combine multiple things. 

For this manicure I've used Zoya, Cosmo, a glittery silver/white holo Pixie Dust. I stamped over the middle finger with Mundo de Unas black polish and Bundle Monster plate BM-417. The ring finger is Sally Hansen Triple Shine in Slick Black. I used super glue to stick on Swarovski crystals that I got at Michael's. I love the color of these crystals and the quality is so much nicer than the plastic/acrylic gems I'm used to. They stayed bright and shiny the entire time unlike the fake gems that dull when covered with topcoat or get the finish rubbed off after a few days of wear.

Birthday Nails with Swarovski Crystals, Zoya Cosmo and Stamping

Do you do special nails for your birthday?

Sunday, January 24, 2016

Quilted Glitter Chevron Nails

Quilted Nails with Chevrons and Glitter + Nina Ultra Pro Polish & Nail Vinyls

I'm enjoying another beautiful rainy day inside, about ready to get started on some new nails for the week. I'm kind of wishing I could be snowed in like the East Coast, but I'll take what I can get. I've been feeling indecisive about what to paint on my nails the last few weeks. Is there anything you've been wanting to see. Let me know!

Quilted Nails with Chevrons and Glitter + Nina Ultra Pro Polish & Nail Vinyls

I've combined a few things for these skittle nails. I started with two coats of Nina Ultra Pro, French Pink (my absolute favorite nude for my skin tone) as the base for the rest of the art.

 I've been wanting to try out a quilted nail for such a long time. It was a little tricky getting the lines straight! I used my old library card because it was flexible and I thought it would be easier to bend it around my nail, but I think the flex of the card made some of my lines a little wiggly. I waited a few minutes till the polish was almost dry, but still dentable and then pressed the card along the nail in a criss-cross pattern. I placed a piece of glitter at each intersection to tie it in with the other glitter nails. 

I used my chevron Nail Vinyls to block off different parts of my nails and painted either a coat of Sinful Colors, Black on Black or sponged on several coats of Nina Ultra Pro, Gilded, which is a really pretty pink-toned holo glitter.

I couldn't decide which color of background I liked best with these nails. What do you think?

Quilted Nails with Chevrons and Glitter + Nina Ultra Pro Polish & Nail Vinyls

Monday, October 26, 2015

Velvet Gradient and a Sparkly Spider

Black and Red Vampy Velvet Gradient with Spiderwebs and Rhinestone Spider

Halloween week continues with these dark and vampy spider nails. I did a similar look last year, and loved it so much I had to reinvent it again. This year I went darker and matte with new coffin shaped nails that I'm loving. I think it really completes the look.

Black and Red Vampy Velvet Gradient with Spiderwebs and Rhinestone Spider

Black and Red Vampy Velvet Gradient with Spiderwebs and Rhinestone Spider

Above I have a shot minus the spider which is really more accurate to how I'm wearing these nails because the spider came off less than three hours after I glued it. It was really cute for the photos, but the legs were catching on everything and it popped right off. I got the spider charm from Miss A (all the nail art supplies there are $1 each). 

My base color is Sinful Colors, Black on Black. I sponged on a gradient of Wet n Wild, Under Your Spell and Sation, Sparkling Ruby. I topped it off with Wet n Wild Matte Top Coat and then painted the web using Color Club, Harp On It for contrast.

Black and Red Vampy Velvet Gradient with Spiderwebs and Rhinestone Spider

This is my favorite Halloween look so far this year. I'm always a sucker for something dark and spooky (but you can't go wrong with spoopy either).

Sunday, October 11, 2015

Wicked Halloween Tips


Nail tips, that is. I hope no one wandered over here hoping for tips about how to Halloween. It's hard enough to get my husband to leave the house for regular social functions.. and ones where he might be required to dress up... not too likely. This is one of my favorite holidays, though. It's all about dressing up and eating candy, possibly (hopefully) while drinking. Even turkey has a hard time topping that. There's also not a lot of pressure to spend time with family which, after moving 10 hours away, is kind of a relief. I already have my costume for this year planned too. It's probably going to be a little offensive to everyone in my office. I can't wait. :) I promise it's nothing too awful. I'll give you a peek once it's closer to being done.


This is one of those rare cases when my right hand (top picture) turned out better than my left. I got the black too high up on the left hand to give the effect of blackened tips.

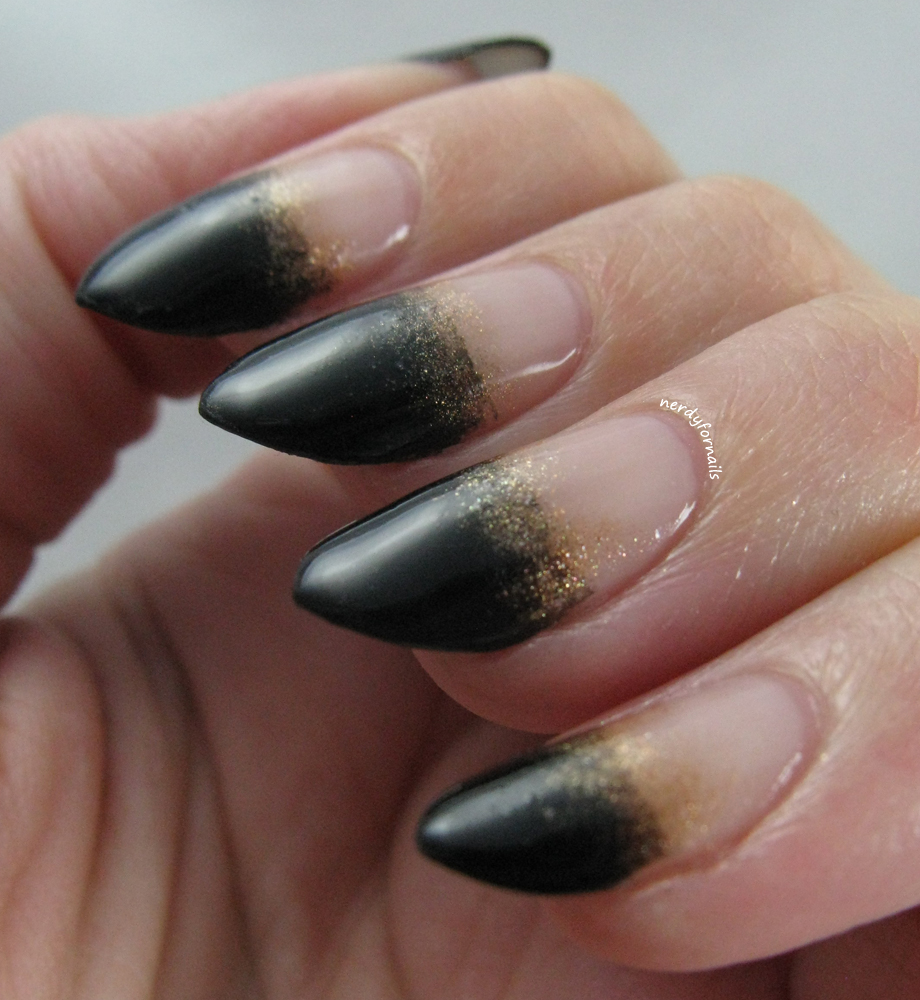
I started by filing my nails much pointier than I usually do for a more sinister look. I love really sharp stilettos but I don't know how those ladies do it without poking their eye out. I've stabbed myself so many times this week and these aren't even that pointy. It's worth it though. A good artist has to suffer for their art. I used my favorite nude for the base, French Pink from Nina Ultra Pro. Next I sponged on a coppery shade, Zoya's Richelle. I topped that with a sponged black layer, then went back and sponged a little more copper on top in an attempt to blend it better. Afterwards I was wishing I tried all three colors wet on the sponge at once. The gradient wasn't quite as smooth as I wanted it. I still not super great at the gradient nails. Must keep practicing.


 I'm sorry I've been super lazy about posting lately. I have tons of motivation to paint, but very little for editing photos and writing. I'm building up quite a backlog! I'm planning all Halloween nails through the end of the month so you can expect to see a little bit more of me for the next few weeks.

Wednesday, February 11, 2015

Gradients: They're Hard

Black and White Stripes with Red Glitter and Gold Accents

This manicure is getting filed directly under the category of "looked way better in my mind and then came out kinda like poo." I envisioned sponged gradient stripes, blending flawlessly from black to while. What I got was blotchy uneven weird stripe-like thingys and some skittlette nails that didn't quite go. I'm really troubled by this whole gradient stripe concept. Can it be done well? I've googled it and haven't found anything quite like what I'm looking for. I have a theory that maybe it would be easier to tape off sections and try to perfect one stripe at a time. It also needs more stripes. Two weren't enough. If I figure this one out you all will be the first to know.

Black and White Stripes with Red Glitter and Gold Accents

This lovely mess consists of:
Sinful Colors- Snow Me White and Black on Black (badly sponged)
Sally Beauty Supply snowman shaped polish in Red Glitter topped with Milani Red glitter.
Sally Hansen Color Foil- Liquid Gold.

Black and White Stripes with Red Glitter and Gold Accents

Thursday, February 5, 2015

Mind The Gap

China Glaze- Mind the Gap- All Aboard Collection- Geometric Line Nail Art

It occurs to me that I'm kind of a jerk blogger. I hardly ever buy current collections. I wait for everything to go on clearance and then post about it a month or two later- just enough time to assure that whatever awesome polish I've posted is completely sold out. The worst part is that I don't feel bad enough to actually change anything. I'll tell myself that my blog is more about the nail art than the swatches. And it is... except when I'm feeling lazy.. which is pretty often these days.. which results in me posting swatches instead of nail art because they're less time consuming to write about. Ehhh. Sorry everyone!

Sooo... this is Mind the Gap from the China Glaze All Aboard collection. There's a bit of art involved so it's totally ok that I'm posting this Fall 2014 collection polish about four months late. I got it on clearance right after Christmas so chances are you won't be able to find it in stores now. Thank goodness for the internet and the fact that this color is more than just a little bit drab. It's a golden-brownish polish with a hint of olive green and a slightly green shimmer. Isn't it hideous? I kind of love it. I'll admit I bought it just for the name, but the color grew on me. 

China Glaze- Mind the Gap- All Aboard Collection- Geometric Line Nail Art

It turned out to be a near perfect match for this dress I bought myself during the after Christmas sales ($8.. crazy!). The dress has little gathered lines sewn into the fabric so I painted on some corresponding lines for my nail art to match the pattern.

I started with two coats of Mind the Gap. This is a slow drying polish! Even with my fast dry top coat I got those annoying sheet marks after going to bed an hour later. It also made the nail art a little tougher to pull off because the polish was still very soft and dentable, but the formula wasn't too bad otherwise (you know, besides this one giant glaring problem). It didn't drag or pool which is always a plus. I painted on the lines with Sinful Colors, Black on Black and a nail art striping brush. For the finishing touch I wadded up a bit of saran wrap, painted some polish onto it and used it dab some of the base color on top of the black lines to tone them down a bit and blend them in. Since the little gathers on the dress still had the gold color I wanted to soften the black lines on my nails too.

China Glaze- Mind the Gap- All Aboard Collection- Geometric Line Nail Art

China Glaze- Mind the Gap- All Aboard Collection- Geometric Line Nail Art

How do you feel about drab polish colors like this one? I wouldn't want to wear them every day, but I like having them as part of my collection.

Wednesday, January 14, 2015

Blingy Geometric Stamping

Orly Bling with Bundle Monster Geometric Stamping

Bling is back again with the addition of some stamping. My last post featured Orly's Bling (this beautiful gold holo base) on its own, but you know I couldn't leave it at that. I had a few days off around the holidays and all I wanted to do was paint my nails. And sleep in. And eat wayyyy too much candy and cookies. I got a lot of new polish to try, but Bling was too beautiful to take off after only a day so I added some stamping. The results are very art deco. It reminds me of all the Great Gatsby inspired manicures people were doing around the time the new movie came out. Coincidentally I watched the movie for the first time during my vacation. I thought it was pretty good. I'm sure it helps I haven't read the book since high school. If you saw the movie, what did you think?

Orly Bling with Bundle Monster Geometric Stamping

I stamped with Mundo de Unas black stamping polish and Bundle Monster plate BM-322 over three coats of Orly, Bling.

Orly Bling with Bundle Monster Geometric Stamping

Monday, November 10, 2014

Fall Fashion Inspired Nails- Macy's: Fashion Rocks

Inspired by Fall Fashion at Macys- Bar III Short-Sleeve Mixed-Media Paneled Dress Fashion Rocks

Fall Fashion at Macys- Bar III Short-Sleeve Mixed-Media Paneled Dress Fashion Rocks

Since I didn't get to see the actual fashion show at Macy's I went to their website and picked a couple outfits to use as inspiration for these fall fashion inspired nails. 

For my first look I picked this black and white Bar III Mixed Media Dress because I loved the graphic print and the rose gold zipper accents. It's kind of hard to see the zippers in the picture above, but if you check it out on the Macy's site they have a nice picture that you can zoom in on to see the details.

Inspired by Fall Fashion at Macys- Bar III Short-Sleeve Mixed-Media Paneled Dress Fashion Rocks

I started with two coats of Sinful Colors, Snow Me White. Next I used the distressed technique to create the print of the dress. This technique is done by wiping most of the paint off the brush before lightly dragging it over the base color. I used Sinful Colors, Black on Black for all the black accents. For the insets I used a small nail art brush and started by outlining the half circles at the side of each nail, then filled them in with black polish. I went back after that was dry and outlined the black areas with my rose gold polish- Orly, Rage. 

This is my favorite look of the two. I just needed an excuse to use Rage again. Such a perfect rose gold color that I don't get to use often enough.

Inspired by Macy's Fall Fashion-  RACHEL Rachel Roy Long-Sleeve Cutout Marble-Print Dress Fashion Rocks

Macy's Fall Fashion-  RACHEL Rachel Roy Long-Sleeve Cutout Marble-Print Dress Fashion Rocks

My second set of nails was inspired by this Rachel Roy Marble Print Dress. I had some gold marble foil that I thought would be perfect for this manicure. I started with two coats of white polish. I used a cleanup brush and acetone to erase the triangle cut out on my index finger to mimic the neckline, but remembering to tape it off in the first place would have also worked. I painted all the white parts of my nails with foil glue and waited for it to get clear and tacky before pressing the foil onto my nails. This Laced Gold foil is from Dollar Nail Art. For the black accents I mixed a drop of black with a drop of clear polish to give it the smoky look the dress has and painted on random lines with a small nail art brush.

Inspired by Macy's Fall Fashion-  RACHEL Rachel Roy Long-Sleeve Cutout Marble-Print Dress Fashion Rocks

I loved doing these fashion inspired nails. Which look is your favorite?

Saturday, November 8, 2014

Fall Fashion Inspired Nails- Leather and Plaid

Fall Fashion Inspired Nails Black Leather and Red Plaid

I've got a funny story for you. I arrived at Macy's early last night to get a good spot for the fashion show, but after looking around everywhere it was clear they didn't have anything set up. I ended up asking 4 different employees and one finally called a manager over. They all had the same story- the fashion show was the previous night (the 6th) and the PR agency must have gotten the date wrong. The press release and even Macy's own website (you can't see it online anymore since the date has passed but I have screenshots) showed the date as the 7th. I'm really disappointed that I didn't get to see the show, but I do have some fall fashion inspired nails to show you anyway. These are based on my favorite fall outfit.

Fall Fashion Inspired Nails Black Leather and Red Plaid

I took my inspiration for the plaid nails from my red dress and a little logistical help from the amazing Chalkboard Nails. I started with two coats of a nice bright red color from See San (a bottle I picked up in Thailand) and then hand painted black squares and tiny lines using a small nail art brush and Sinful Colors, Black on Black.

I used Sinful Colors, Whipped from their matte line for the leather inspired nails and then topped them off with Wet n Wild, Matte Top Coat for extra matte-ness. The shiny silver nail is a base of China Glaze, Recycle which I covered in Pewter nail foil from Dollar Nail Art. The leather and shiny nails perfectly match these boots that I would be completely in love with if they weren't too tight and incredibly uncomfortable after about five minutes. I need to work on stretching them out so I can actually wear them all day without wanting to throw them across the room when I get home.

Fall Fashion Inspired Nails Black Leather and Red Plaid

Since I didn't get to see the fashion show I'm going to troll the internet for more fall looks to base some nail art on. What fall trends are your favorites? I can't get enough boots with legging and skirts.

Thursday, October 30, 2014

Red & Black Vampy Halloween Manicure

Red and Black Vampy Halloween Gradient Manicure with Bird Skull

Ah, Halloween. The one time of year when my macabre sense of style is somewhat socially acceptable. This little bird skull usually lives in my hutch, but I think it makes the perfect prop for a vampy Halloween gradient. I also love how the slightly pointed nail shape makes this manicure look a little more wicked.

Red and Black Vampy Gradient Halloween Manicure

The downside? Red and black polishes are both a serious pain to clean up and gradients are messy. I tried the glue thing for the first time and I have to say it was pretty helpful. Before I started painting I used a small brush to paint a layer of white school glue around the edges of my nails and cuticle. After I was done painting I peeled the glue off and 90% of the cleanup was done already. It was a little tricky getting all the glue to peel off at once, but definitely worth the extra prep work. 

I started with one coat of Spoiled, Hit The Brakes which is a slightly jelly red that has great coverage. Next I painted half red and half black on a makeup sponge and sponged each nail moving up and down slightly to blend the colors. I did this about 3 times on each nail to get full black coverage on the tips. I finished up with top coat to smooth it all out 

Red and Black Vampy Gradient Halloween Manicure

Tuesday, October 28, 2014

Happy Holo-Ween (With CbL Black Gold, Texas Tea)

Holo-ween Halloween Spider Web Manicure CbL Black Gold, Texas Tea

Happy Halloween! I love this holiday- such a great way to start off the season. It's finally starting to get cooler outside and the other holidays are just around the corner. Plus dressing up and candy? Yes, please! My nails are getting started a few days early with some cute double holo spiderwebs. 

Holo-ween Halloween Spider Web Manicure CbL Black Gold, Texas Tea

Holo-ween Halloween Spider Web Manicure CbL Black Gold, Texas Tea

Oh, the rainbows. I recently went on a quest to find the perfect black holo for Halloween. After looking at a ton of swatches I finally settled on Black Gold, Texas Tea from Colors by Llarowe. Isn't it gorgeous? I've got some pictures in indoor lighting and some in direct sunlight so you can get an idea of how it looks inside and out. The rainbows definitely pop out in the sun, but it's still plenty pretty inside.

I started with two coats of Black Gold, Texas Tea. Next I used a small nail art brush to paint diagonal lines on two nails using Color Club, Harp On It (a pretty silvery holo). I added slightly curved lines in between the diagonals to create the web and finished it all off with top coat.

CbL Colors By Llarowe Black Gold, Texas Tea Swatch

CbL Colors By Llarowe Black Gold, Texas Tea Swatch

Monday, September 1, 2014

Toesday: Coral Chevron Pedicure

After my last manicure I was so in love with this look that I created a matching version for my toes. I kept the same color palatte, but changed up the placement of the patterned nails. Stamping makes it so easy to get detailed patterns on even the tiniest toenails. Of course the day I painted my toes was the day I took the polish off my fingers so the two never got to live up to their full potential together, but it was great two hours of overlap.

Chevron coral zig zag toes pedicure with studs

What I used: NYC Tropicoral, LA Colors White stamped with Bundle Monster plate BM-201 and Mundo de Unas black stamping polish. I used gold studs that I bought from the Born Pretty store to bring in that pop of gold and accent my big toes.

Chevron coral zig zag toes pedicure with studs

Do your fingers and toes match? Mine hardly ever do.