Showing posts with label Nina Ultra Pro. Show all posts

Monday, April 10, 2017

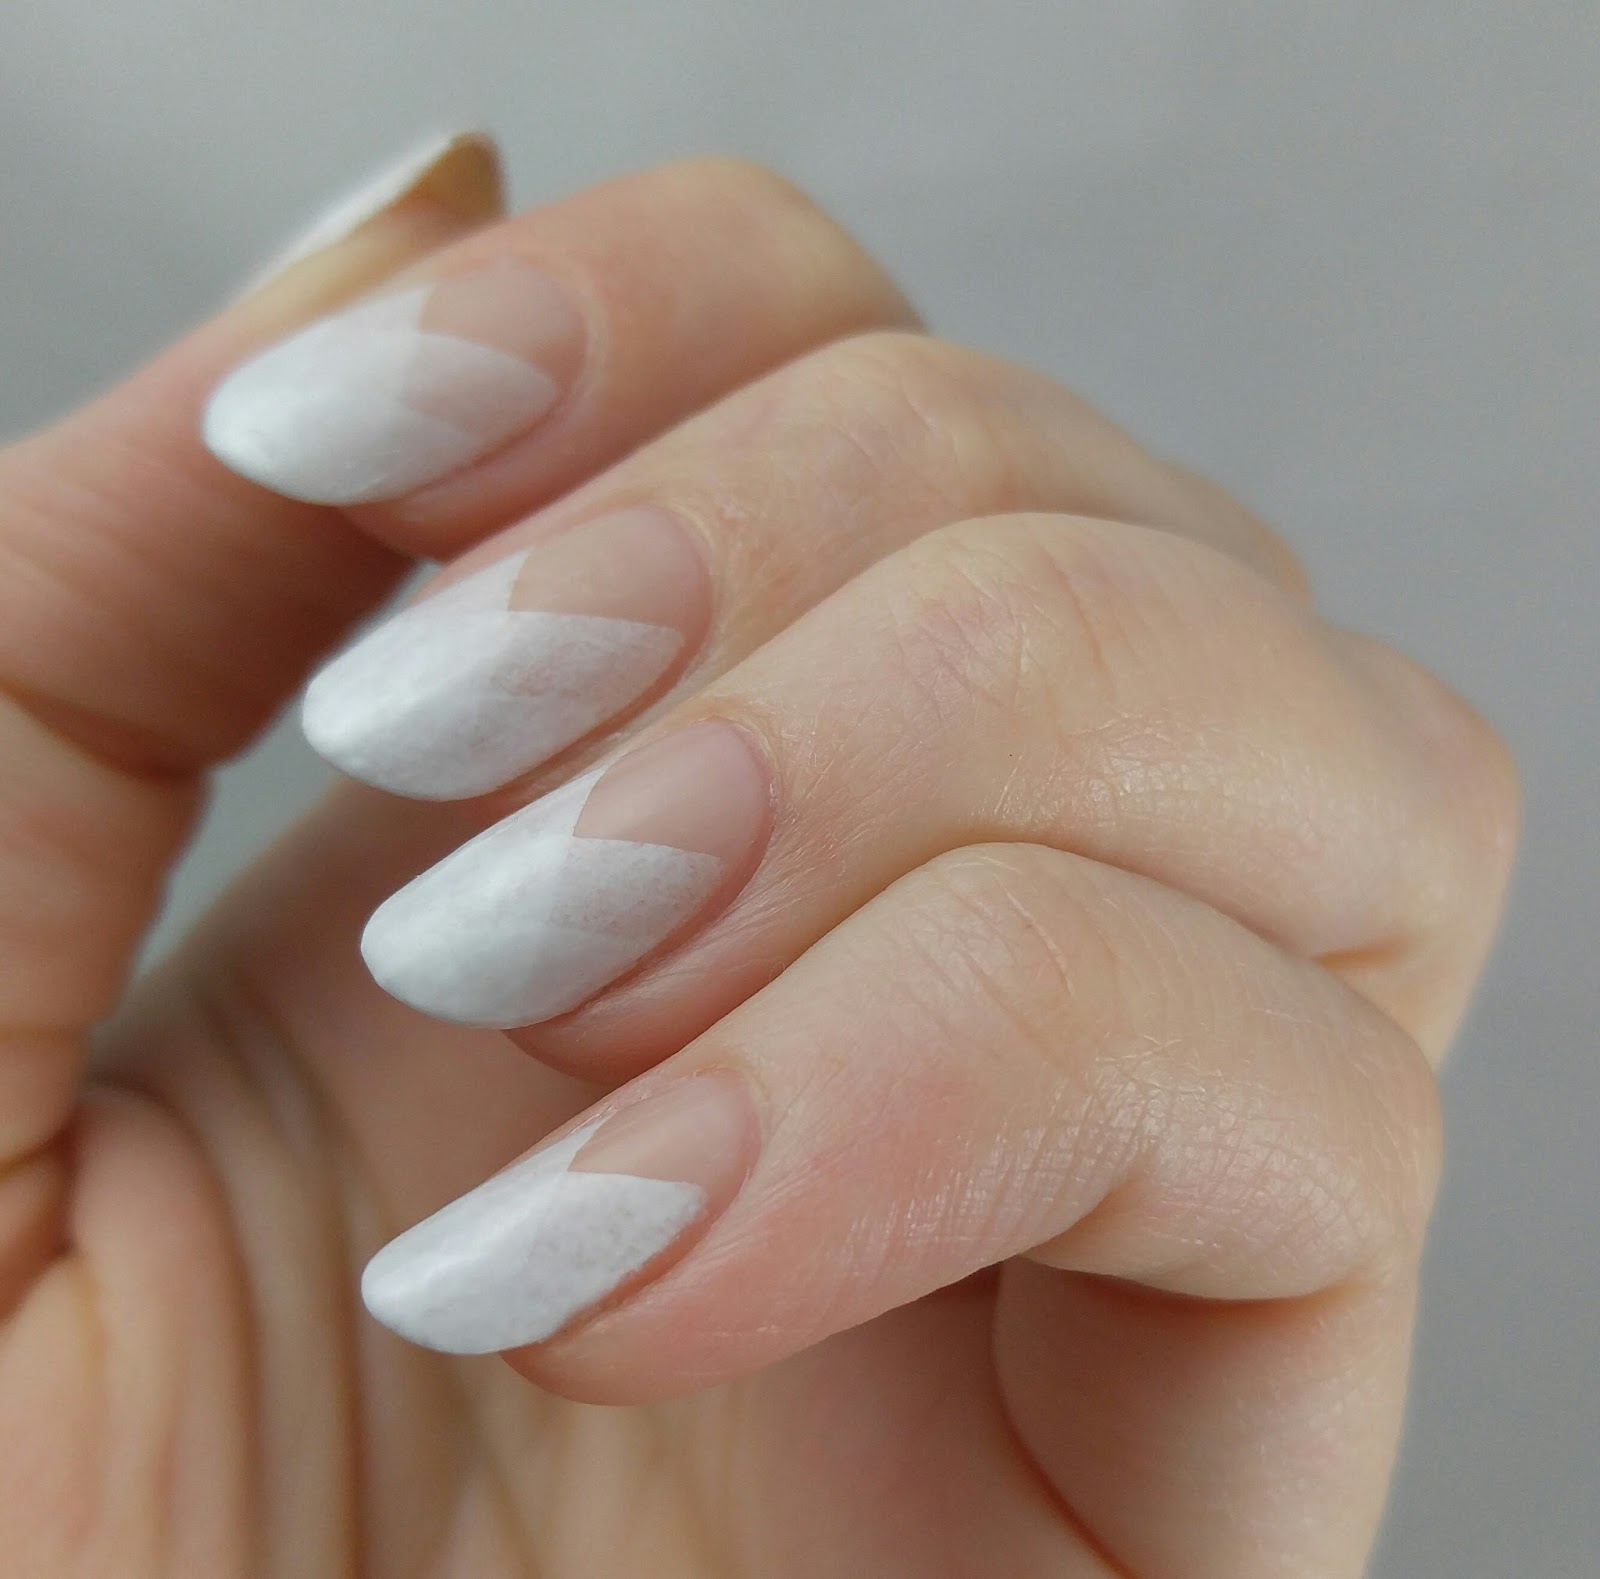
Getting Spongy


In more ways than one? In the spirit of sharing all the boring details of my life I feel compelled to tell you that I'm on a very depressing diet of healthy foods. I've been feeling a little extra around the middle lately and I've finally found the motivation to eat healthier and exercise a bit. It's been almost three whole weeks and not much progress aside from having kickass nails. I'm currently cheating with a delicious beer at my favorite brewery.


These nails were inspired by a cool Instagram pic which I fully intended to link and give credit to until the untimely demise of my beautiful new phone. I haven't been able to find the original picture after losing all my saved files. If you know who did this first let me know. I'm back to using my nearly unbearable iPhone but that's a story for another day. 

I started with a base of Nina Ultra Pro, French Pink. Next I taped off sections of the nail, 4 times for each. Using Seche, Calla Lily, I sponged a light layer so that the white polish built up more at the tip. The effect is subtle but really cool. I want to try this again with different colors.


Tuesday, March 14, 2017

Everyone's Irish on St Patrick's Day

Green nails for St Patrick's Day

Gold nails for St Patrick's Day

St Patrick's is on a Friday this year?!? I'm not sure if I should be excited or scared. I don't usually make plans but this year might have to be an exception.

I had the idea to mix my favorite green and gold polishes for a subtle St Patrick's look.

Gold nails for St Patrick's Day

The golds: Sally Hansen Complete Salon Manicure- Golden Rule + Victoria's Secret- Runway Angel, Sally Hansen Color Foil- Liquid Gold, Orly- Bling, 24k gold leaf with clear polish, Nina Ultra Pro- Big Spender

Green nails for St Patrick's Day

The greens: Revlon- Tantalize, Seche- Charming, OPI- Plaid About You, China Glaze- Rare and Radient, Zoya- Ivanka

Green nails for St Patrick's Day

Do you have any exciting plans this St Patrick's Day?

Thursday, March 31, 2016

Lilac Whisper, A Nail Fail and My Thoughts on Anna Karenina

Nina Ultra Pro Lilac Whisper Swatch

I feel like I should apologize for another extended absence. I got the crazy flu that's been going around and had six days in a row where my temperature was over 100 degrees. I spent a lot of time napping and watching Netflix. Today is actually the first day I've gotten home after work and felt up to doing anything besides taking an hour long nap before dinner.

Let's take it nice and easy for my first day back with a swatch of a pretty Lilac color. The brush in this Nina Ultra Pro bottle seemed even wider than their normal gargantuan brush. I could almost coat my entire nail in one stroke. This made application a little tricky, but the formula was nice, with good coverage in two coats.

Nina Ultra Pro Lilac Whisper Swatch Nail Fail

Above you can witness my nail fail in which I tried applying metallic temporary tattoos to my nails. I found body-sized tattoos at the dollar store and thought it would be fun to try on my nails. I had to cut out the bits I liked to fit, then had trouble placing them on my nails. The one on my middle finger is way off center and too far down.. and what's going on with the ring finger... is it wearing a bow tie? A sad, sad bow tie that decided life wasn't worth living and tried to bleed out all its color with the top coat. The thumb might have been cool, except like most foils these things decided to wrinkle up when I applied top coat. I'm still on the quest to find one that doesn't ruin nail foils. The lilac was so pretty by itself I was really wishing I'd left it alone.
Anna Karenina

While I was painting these nails I was watching Anna Karenina so now you must all be subjected to my highly educational and serious book/movie review. I couldn't help noticing that Anna's cuticles are a bit dry. I guess those are the perils of winter in Russia! I read the book (or should say finished reading) sometime last year. I started it around Christmas 2013 and it took an absolute eternity for me to push through and finish the thing. I read bits and pieces off and on throughout 2014 and finally kicked my butt into gear to finish it around April of 2015. I kept feeling like there would be some grand epiphany, but the book pretty much ended the same way it started. Some stuff happened, then some more stuff happened and some people did a bunch of stuff. They talked about things and had philosophical ideas. Anna is in it.. part of the time. You'll meet some other guys too. The movie is a condensed version that leaves out a ton of plot points from the book. I thought it was fairly well done and had a very Baz Luhrmann feel to the directing (it wasn't Baz, I checked.. again). I'm mostly happy if the movie can avoid changing the plot entirely which this movie achieved. I can't really blame them for leaving things out. That book was seriously long! I never felt bored while reading, but I also never felt inspired to pick the book up when I wasn't reading. I'm glad I got through it and I'm sure it's a beautiful work of art, but I can't find the motivation to say I "loved" it. It was an experience and one I'm glad I've had if only to say I did it. 
The End (hope you enjoyed my novel too).

Sunday, January 24, 2016

Quilted Glitter Chevron Nails

Quilted Nails with Chevrons and Glitter + Nina Ultra Pro Polish & Nail Vinyls

I'm enjoying another beautiful rainy day inside, about ready to get started on some new nails for the week. I'm kind of wishing I could be snowed in like the East Coast, but I'll take what I can get. I've been feeling indecisive about what to paint on my nails the last few weeks. Is there anything you've been wanting to see. Let me know!

Quilted Nails with Chevrons and Glitter + Nina Ultra Pro Polish & Nail Vinyls

I've combined a few things for these skittle nails. I started with two coats of Nina Ultra Pro, French Pink (my absolute favorite nude for my skin tone) as the base for the rest of the art.

 I've been wanting to try out a quilted nail for such a long time. It was a little tricky getting the lines straight! I used my old library card because it was flexible and I thought it would be easier to bend it around my nail, but I think the flex of the card made some of my lines a little wiggly. I waited a few minutes till the polish was almost dry, but still dentable and then pressed the card along the nail in a criss-cross pattern. I placed a piece of glitter at each intersection to tie it in with the other glitter nails. 

I used my chevron Nail Vinyls to block off different parts of my nails and painted either a coat of Sinful Colors, Black on Black or sponged on several coats of Nina Ultra Pro, Gilded, which is a really pretty pink-toned holo glitter.

I couldn't decide which color of background I liked best with these nails. What do you think?

Quilted Nails with Chevrons and Glitter + Nina Ultra Pro Polish & Nail Vinyls

Sunday, October 11, 2015

Wicked Halloween Tips


Nail tips, that is. I hope no one wandered over here hoping for tips about how to Halloween. It's hard enough to get my husband to leave the house for regular social functions.. and ones where he might be required to dress up... not too likely. This is one of my favorite holidays, though. It's all about dressing up and eating candy, possibly (hopefully) while drinking. Even turkey has a hard time topping that. There's also not a lot of pressure to spend time with family which, after moving 10 hours away, is kind of a relief. I already have my costume for this year planned too. It's probably going to be a little offensive to everyone in my office. I can't wait. :) I promise it's nothing too awful. I'll give you a peek once it's closer to being done.


This is one of those rare cases when my right hand (top picture) turned out better than my left. I got the black too high up on the left hand to give the effect of blackened tips.

I started by filing my nails much pointier than I usually do for a more sinister look. I love really sharp stilettos but I don't know how those ladies do it without poking their eye out. I've stabbed myself so many times this week and these aren't even that pointy. It's worth it though. A good artist has to suffer for their art. I used my favorite nude for the base, French Pink from Nina Ultra Pro. Next I sponged on a coppery shade, Zoya's Richelle. I topped that with a sponged black layer, then went back and sponged a little more copper on top in an attempt to blend it better. Afterwards I was wishing I tried all three colors wet on the sponge at once. The gradient wasn't quite as smooth as I wanted it. I still not super great at the gradient nails. Must keep practicing.


 I'm sorry I've been super lazy about posting lately. I have tons of motivation to paint, but very little for editing photos and writing. I'm building up quite a backlog! I'm planning all Halloween nails through the end of the month so you can expect to see a little bit more of me for the next few weeks.

Sunday, July 12, 2015

Interview Appropriate Nails- French Pink and Subtle Stamping

Work or Interview Appropriate Nails Nina Ultra Pro French Pink with Feather Stamping

It's been a few days since I checked in, and I've been quite busy with my job search. Since my last post I've had one interview and I have two more scheduled for tomorrow and a job fair later in the week. Wish me luck! Even though I know I'll do fine I get super nervous any time I have to talk to people in the outside world for "official" purposes. It's weird, because I'm fine interacting with people in normal circumstances, but add in the word interview and suddenly I'm a wreck. I'm glad that I have blogging to keep myself somewhat distracted.

I think these are going to be my favorite interview nails of all time. Or at least they'll be really hard to beat. I LOVE this shade from Nina Ultra Pro. It's so feminine and perfectly understated. And because it's realllly hard for me to have plain nails with no decoration I added a stamped feather (you know, to symbolize how I'm flying away to bigger and better things). The feather blends in at a distance and my last interviewer didn't seem to notice at all so I'd say it's a pass.

Work or Interview Appropriate Nails Nina Ultra Pro French Pink with Feather Stamping

The last time I used French Pink from Nina Ultra Pro I did three coats for more opaque coverage, but this time I only did two. I actually like the faintly visible nail line and think it looks like a very subtle and classy french manicure without the effort of actually painting on the tips. 

The stamping is Bundle Monster plate BM-419 with Mundo de Unas white stamping polish.

Work or Interview Appropriate Nails Nina Ultra Pro French Pink with Feather Stamping

I'm hoping this is my lucky feather!

Thursday, January 29, 2015

I Love Triangle(s)

Nina Ultra Pro French Pink with Bundle Monster Stamping and Cuticle Tattoo

Nina Ultra Pro French Pink with Bundle Monster Stamping and Cuticle Tattoo

I've been craving some new stamping plates and Bundle Monster had a pretty good sale around Christmas time (15% off I think) so I bought two sets. I don't remember the official names, but I got the 400 and 600 series. They have a pretty good variety between the two so hopefully these will keep me entertained for a while. I've been trying really hard not to cave in and buy the very expensive MoYou London plates.

I love the tribal designs in these latest sets of BM plates. Both sets had a few options to choose from. The stamp I picked for this manicure is actually stacked triangles, but since the corners got cut off it's a little hard to tell. I'm looking at them now and wishing I had put the tip of the bottom triangle at the tip of my nail instead of the way it ended up.

Nina Ultra Pro French Pink with Bundle Monster Stamping and Cuticle Tattoo

 Good news! I think I may have found my perfect nude polish. This is French Pink by Nina Ultra Pro. My skin tone is very pink-based so this is a great match. The polish is a crelly with pretty darn good coverage. I put on three coats to make extra sure the nail line was covered, but I was impressed that it looked solid in two coats. I stamped with Bundle Monster plate BM-403 and Mundo de Unas black stamping polish. As mentioned above the cuticle tattoo is also from Bundle Monster. One sheet has 20 tattoos on it for $1.50. I've been wanting to try these out so I was happy to pick them up pretty cheap. Sadly, the tattoo didn't last very long. Hand washing definitely takes a toll quickly. I'd say these are best used for a special occasion/event because it started rubbing off after just a few hours. If they had been more expensive I'd be disappointed, but they're cheap enough it was ok.

Nina Ultra Pro French Pink with Bundle Monster Stamping and Cuticle Tattoo

What do you think of the cuticle tattoo trend? I was a little hesitant at first, but I kind of love them now.

Thursday, November 13, 2014

Assassin's Creed Nails

Assassin's Creed Nails

Hey, look- I'm actually doing nerdy nails again. I used this manicure in my new header, but hadn't gotten around to posting it yet. It's about time too. Assassin's Creed is one of my favorite series. I played the first one soon after it came out and I was hooked. The second one took all the good parts, chucked most of the bad and got me even more addicted. I'm almost done with Brotherhood (the 3rd one), so I can't speak for the rest (there are 8 so far!), but it seems like they improve a bit with each game. I love running through the cities in the game and then seeing pictures or documentaries on TV and I really feel like I've been there. They did a fantastic job with the artwork and atmosphere of the game. Plus I'm learning about history (probably) so it's making me smarter too. I've been grabbing the rest of the series on Steam sales as they get cheap, but seriously.. so many games, so little time. I'll finish them all someday even if it takes me 40 more years.

Assassin's Creed Nails

Now for the technical stuff. For the gradient I started with two coats of Sinful Colors, Snow Me White. The medium grey is China Glaze, Recycle and the darker grey is Nina Ultra Pro, Inkling. I cut a makeup sponge to about the size of my nails and painted all three colors of polish onto it, then rolled it over my nails, moving it up and down slightly to blend the colors. I repainted the sponge and applied to my nails about 3-4 times to get the opacity and blending I wanted.

Now lets talk about the foil nail. Tragically that day I had ripped this nail almost half way across, but I really wanted to paint these AC nails and wasn't ready to cut it down yet so I used the tea bag method to patch it up. The patch is pretty smooth, but I think the shininess of the foil highlights every little bump which is unfortunate. I wanted to make the middle finger look like metal to replicate the hidden blade that Altair and Ezio use to stealth stab their enemies. Because what's better than sneaking up behind someone and stabbing them in the throat right? The foil I used is Pewter from Dollar Nail Art. It has a cool brushed metal look that was perfect for my blade. Don't worry, no throats were harmed during the wearing of this manicure.

The logo nail- I used black acrylic paint and my tiny nail art brush and I free handed that sucker onto my thumb nail. It's a pretty simple logo, so it wasn't as hard as some I've tried, but you will need a steady hand if you want to try this. Half the time I end up painting my art on crooked because I have my hand turned a funny direction, so I was really happy with how this came out.

Assassin's Creed Logo Nails

Sunday, December 1, 2013

(S)he Picks My Polish: November Edition

It's still November right? No? I don't know how it became December all of a sudden today. I had really good intentions of getting this post up two weeks ago when I actually painted these, but you know what they say about good intentions. They apparently don't help with blog posts. For the November "He Picks My Polish" challenge we decided to change things up a bit and have a female choose the polishes instead. My mom helped all the way from Thailand.  Since she's so far away I had her choose three colors and numbers and I used the corresponding polishes. I have to say, she did a surprisingly good job with her random unseen picks.


She picked a grey a purple and a glitter:
Nina Ultra Pro- Inkling- such a nice inky grey
Zoya- Julieanne- the sparkliest purple
Sally Hansen Xtreme Wear- In the Spotlight- beautiful holographic bar glitter


I started with Inkling as my base and used scotch tape to tape off the triangles and filled them in with Julieanne. I used one coat of In the Spotlight on my index finger (under the triangle) and two coats on my pinkie. I thought I'd need more coats of the glitter but with careful dabbing I was able to get the coverage I wanted in just two. My mom knows me well and she picked my two favorite colors so of course I absolutely love how this came out.


Rainbows.. mmmm.

Tuesday, August 27, 2013

Toesday: Teeny Tiny Leopard Print

Happy Toesday everyone! Well, it's still Tuesday here for a couple hours at least. I don't know if I mentioned before that I work on a college campus. School started back this week and it's been complete madness and lots of super fun unpaid overtime for me. On the bright side more people on campus = more compliments on my nails. I'll take any excuse to talk about polish at work. Today I have some cute leopard print toes to show you.


I had some crazy idea for a gradient which seemed like it would be great until I actually got around to the painting. It didn't happen so I have some light and dark toes by accident totally planned and on purpose. The dark is Nina Ultra Pro, Ink-ling and the lighter shade is Sally Hansen Complete Salon Manicure in Ion. I used a dotting tool to dot on LA Colors, Hottie (I can't get enough of this color lately) then painted around the dots with black polish and a tiny paint brush to create the leopard spots.


Saturday, August 24, 2013

Circle Stamping Decals

I really love all the stamping decals I've been seeing these days. It was only a matter of time before I tried it out myself so here I am. I'm not really great at stamping yet so this is an awesome way to get unlimited tries without the fear of messing up the base color. I followed this tutorial because it shows how to create multiple decals on a sheet at one time vs making the decal directly on the stamper. This appealed to me more since I only have one stamper but wanted to make decals for more than one nail. 


 It looks like the tutorial used a plastic baggie, but I used waxed paper and it turned out fine. I tried out a non fast dry top coat first but it stayed sticky forever and wouldn't peel off the sheet. I found that a fast dry top coat works much better so I ended up using Sally Hansen Insta-Dri. I painted little rectangles of top coat onto my waxed paper and waited for it to dry. Next I used Bundle Monster plate BM-206 with Wet n Wild, Black Creme for the stamp. I used a tiny paint brush and LA Colors, Hottie (neon coral), Island Girl, Aloha Paradise (teal), and Nina Ultra Pro, Ink-Ling (dark grey) to fill in the circles. For the fingers with the decals I used Sally Hansen Complete Salon Manicure in Ion as the base. Once all the circles were dry I covered it with another layer of top coat, waited for that to dry and peeled it off the sheet. I stuck the rectangles on the slightly tacky polish and trimmed around the edges with cuticle scissors. Lastly, I used a paint brush dipped in acetone to clean up the edges and help the polish melt into the base coat and adhere a bit better and finished it off with more top coat. It seems like a lot of layers, but the decal fit smoothly to the nail and didn't feel thick or bulky. It was actually a lot easier to apply than some nail decals I've tried. If I hadn't picked such a time consuming stamp to fill in I'd even say this is a pretty fast way to get a fancy looking manicure.


Wednesday, August 21, 2013

Opa! Fresno Greek Fest 2013

This weekend brings one of my favorite local events that I look forward to each year: Fresno Greek Fest. This is the 53rd year they've been holding it and it'll be my 4th year attending. The highlight is definitely the delicious Greek food. I heard on the radio today they're making 30,000 pieces of pastries. I'll be taking home at least a dozen baklava (ok maybe two dozen- they're really good). They also have Greek dancing, music and tours of their gorgeous church. I painted some festive nails to get in the spirit. 


This is: two coats of Wet n Wild, French White Creme. The lettering was done with a tiny paint brush and Sinful Colors, Endless Blue. For the yellow/gold shade I mixed together Sally Hansen Insta-Dri, Expres-so Yellow and Nina Ultra Pro, Big Spender. I topped it off with Sally Hansen Insta-Dri top coat.


Saturday, June 22, 2013

Dressed Up in Studs

 Hello from Vegas. I'm here this week for work, but I couldn't resist getting a good post in. I thought about painting a tiny Vegas strip on my nails but somehow that seemed kinda like wearing a band's t-shirt to their own concert so I went with the next obvious choice... studs! These also match the dress I'll be wearing tonight (yeah, check out the cheesy title) so I'm excited about that. 


I started with two coats of each polish. The black nails are LA Colors, Black Velvet. The grey is Nina Ultra Pro, Ink-ling (loving this shade) and the green is Sally Hansen, Limestone. I used scotch tape to tape off sections on my middle and pinkie fingers and painted some color blocks. I added the studs in two sizes from Born Pretty by painting a section of clear polish and pressing them down firmly. I topped it off with two coats of clear polish to seal the edges and keep them from catching and popping off.


I didn't get this posted quite as early as I'd hoped (silly work meetings) but that means I can show you a picture of the dress. Behold the matchy-ness. Well, aside from everything looking blue- this was taken right outside the Blue Man Group show which we all got to see for free thanks to the company.


Sunday, May 12, 2013

Laid-Back 31 DC: Inspired By A Blogger

Today I'm inspired by the talented Robin Moses. I love her designs because they look so intricate and complicated, but the videos explain everything so well it's like you're a nail art pro in minutes. I chose her video Badass Steampunk Nail Art Roses and Stripes Vignette as my inspiration for today's challenge. The roses also seem really appropriate for mother's day. I have the most amazing mom ever and since I can't send her real roses (she lives in another country at the moment) at least I can paint some for her.


The video probably does a better job with the how to portion
so I'll just skip ahead to what I used:
Wet n Wild, 2% Milk
Wet n Wild, Black Creme
Zoya, Richelle
Nina Ultra Pro, Mossy Britches
Wet n Wild, French White Creme
Color Club, Berry and Bright (smells like berries)