Thursday, October 30, 2014

Red & Black Vampy Halloween Manicure

Red and Black Vampy Halloween Gradient Manicure with Bird Skull

Ah, Halloween. The one time of year when my macabre sense of style is somewhat socially acceptable. This little bird skull usually lives in my hutch, but I think it makes the perfect prop for a vampy Halloween gradient. I also love how the slightly pointed nail shape makes this manicure look a little more wicked.

Red and Black Vampy Gradient Halloween Manicure

The downside? Red and black polishes are both a serious pain to clean up and gradients are messy. I tried the glue thing for the first time and I have to say it was pretty helpful. Before I started painting I used a small brush to paint a layer of white school glue around the edges of my nails and cuticle. After I was done painting I peeled the glue off and 90% of the cleanup was done already. It was a little tricky getting all the glue to peel off at once, but definitely worth the extra prep work. 

I started with one coat of Spoiled, Hit The Brakes which is a slightly jelly red that has great coverage. Next I painted half red and half black on a makeup sponge and sponged each nail moving up and down slightly to blend the colors. I did this about 3 times on each nail to get full black coverage on the tips. I finished up with top coat to smooth it all out 

Red and Black Vampy Gradient Halloween Manicure

Tuesday, October 28, 2014

Happy Holo-Ween (With CbL Black Gold, Texas Tea)

Holo-ween Halloween Spider Web Manicure CbL Black Gold, Texas Tea

Happy Halloween! I love this holiday- such a great way to start off the season. It's finally starting to get cooler outside and the other holidays are just around the corner. Plus dressing up and candy? Yes, please! My nails are getting started a few days early with some cute double holo spiderwebs. 

Holo-ween Halloween Spider Web Manicure CbL Black Gold, Texas Tea

Holo-ween Halloween Spider Web Manicure CbL Black Gold, Texas Tea

Oh, the rainbows. I recently went on a quest to find the perfect black holo for Halloween. After looking at a ton of swatches I finally settled on Black Gold, Texas Tea from Colors by Llarowe. Isn't it gorgeous? I've got some pictures in indoor lighting and some in direct sunlight so you can get an idea of how it looks inside and out. The rainbows definitely pop out in the sun, but it's still plenty pretty inside.

I started with two coats of Black Gold, Texas Tea. Next I used a small nail art brush to paint diagonal lines on two nails using Color Club, Harp On It (a pretty silvery holo). I added slightly curved lines in between the diagonals to create the web and finished it all off with top coat.

CbL Colors By Llarowe Black Gold, Texas Tea Swatch

CbL Colors By Llarowe Black Gold, Texas Tea Swatch

Sunday, October 26, 2014

Sally Hansen Color Foil Recap


In case you missed it here's a recap of my Sally Hansen Color Foil reviews. Which color is your favorite? For me the ones that stood out the most were Liquid Gold and Leaden Lilac.

For more pictures and details on each polish here are the links to the original posts:

Liquid Gold- swatch and stamped
Minted Metal- swatch and stamped
Leaden Lilac- swatch
Purple Alloy- swatch and stamped
Titanium Flush- swatch and stamped


Wednesday, October 22, 2014

Sally Hansen Color Foil Leaden Lilac

Sally Hansen Color Foil Leaden Lilac Swatch

I'll admit, when I first started out with the Color Foils I didn't anticipate that it would take me over a month to get through them. I wanted to show each polish, but now I completely understand why most bloggers combine them into one or two posts. I really enjoyed working with the polishes, but if I'm slightly bored of writing about them you all must be at least a little tired of seeing them by now. And I didn't even get all the colors! I think I'm missing the blue and silver shades and there's one more pink color (Rose Copper) that I bought and didn't swatch. Happily I have plenty of new stuff to show you over the next few weeks including some nail art.

Sally Hansen Color Foil Leaden Lilac Swatch

If you've stuck with me through this series you'll know that this is two coats (no base coat) of Leaden Lilac. This polish does like to show off the imperfections in your nails. You can see I have a little bit of the peelies on my middle nail which you can't see with regular polish. It's not very noticeable in person though. 

My overall impressions of the Color Foil line? Love. I think these are prefect for fall and winter with the subtle shine. I can't wait to use these for nail art during the holidays.

Sally Hansen Color Foil Leaden Lilac Swatch

Sunday, October 19, 2014

Sally Hansen Color Foil Liquid Gold Stamped

Sally Hansen Color Foil Liquid Gold with Bundle Monster Stamping

Hey, look at that.. it's my other hand. Ol' righty doesn't make an appearance very often and it felt so awkward trying to pose with the wrong hand. Today I've stamped over Liquid Gold with Bundle Monster plate BM-310. This plate has the same pattern both as the outline and then filled in to create that inverse stamping look. Sometimes I have trouble finding polishes that stamp on top of each other equally well so this kind of plate helps with that. I've stamped with Mundo de Unas white stamping polish which is quite opaque as you can see.

Sally Hansen Color Foil Liquid Gold with Bundle Monster Stamping

Here's the reason why you're seeing my right hand today:

Sally Hansen Color Foil Liquid Gold with Bundle Monster Stamping

 When I put top coat over my design it leeched the gold color from underneath making the white polish look yellow. I didn't love this at all and wanted to show the stamping the way I intended it. If I tried this again I'd put top coat over the gold polish before stamping to hopefully seal in the colors and keep them separate. I didn't have this trouble with any of the other shades (although I also wasn't using white) so that's something to keep in mind if you're attempting to stamp over the Color Foils with white polish.

Wednesday, October 15, 2014

Sally Hansen Color Foil- Liquid Gold


Liquid Gold! I can't hear that name without thinking of those cheesy (ha) Velveeta commercials. Like this one:


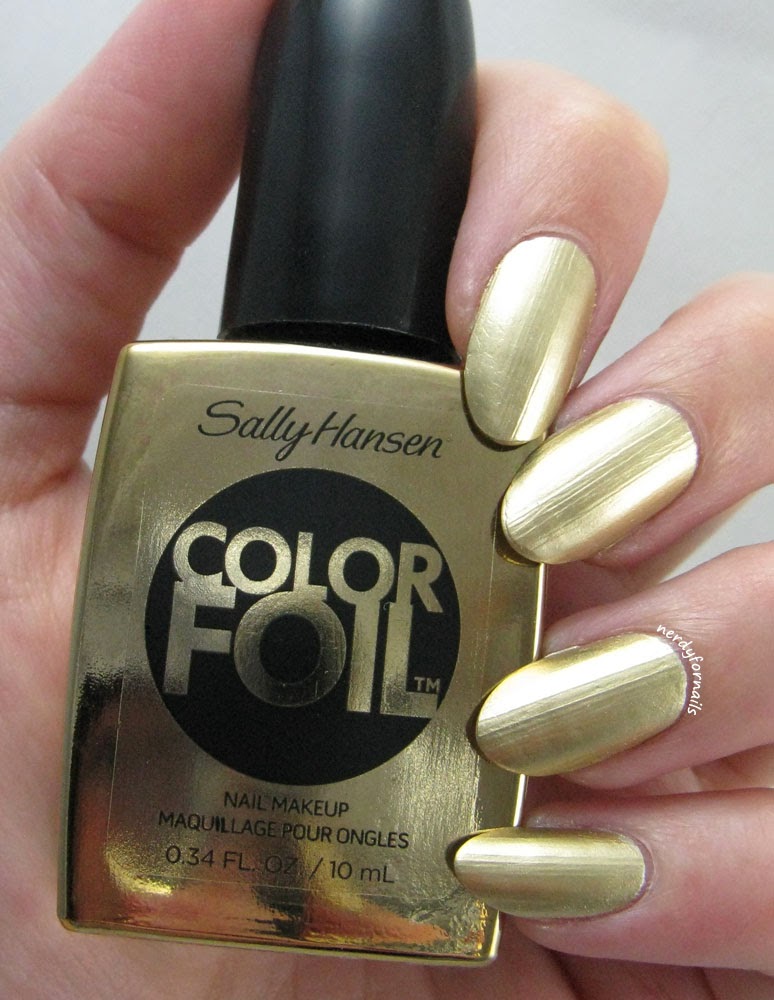
Anyway, back to the polish. This is one I bought myself as soon as the Color Foils came out because I had to have it and I wasn't disappointed. I love the finish of this shade. It's more matte than shiny and the soft glow is perfect. This is two coats of Liquid Gold with no base coat. This might just be my favorite of the bunch.

Sally Hansen Color Foil Liquid Gold Swatch

Sally Hansen Color Foil Liquid Gold Swatch


Wednesday, October 8, 2014

Sally Hansen Color Foil Titanium Flush- Stamped

Sally Hansen Color Foil Titanium Flush with Bundle Monster and Mundo de Unas Stamping

I took a quick detour from my Color Foil reviews to do my first ever tutorial, but I'm back now with more. Only two more colors to go after today. I've enjoyed working with these polishes so much, but I'm excited to show you what else I've been working on. 

Today I have the stamping to go with the latest shade of Color Foil- Titanium Flush. I'm not going to lie, this is one of my least favorite manicures of all time. I think it looks pretty in the pictures, but I hated wearing this! The pink... so eye searing and Barbie-like. Normally I like bright, but this was just the wrong combination for me.

Sally Hansen Color Foil Titanium Flush with Bundle Monster and Mundo de Unas Stamping

The details: two coats of Titanium Flush topped with stamping. Bundle Monster plate BM-320 and Mundo de Unas #15- Mexican Pink.

Sally Hansen Color Foil Titanium Flush with Bundle Monster and Mundo de Unas Stamping

Sunday, October 5, 2014

Tutorial: How to Use Wet n Wild Fantasy Maker Confetti

Wet n Wild Fantasy Makers Glitter Manicure Tutorial

It's the time of year for costumes, pumpkin spiced everything and best of all the Wet n Wild Fantasy Makers collection. I love that everything in the collection is really affordable. Even still, I can't bear to empty the entire bottle of Confetti into a bottle of clear polish just to get it onto my nails. I've made this tutorial to show how to get dense coverage while using barely any of your precious Confetti glitter. Read on to see how.

Wednesday, October 1, 2014

Sally Hansen Color Foil Titanium Flush

Sally Hansen Color Foil Titanium Flush Swatch

I'm just past the half way mark for my Color Foil reviews and this is the first time I noticed the small print on the bottle, "nail makeup." You see polish and lacquer so often, but never makeup. I love it! Titanium Flush is another one of the shades I was sent for review. I didn't originally buy it because I didn't think I'd like it. I'm not usually a huge fan of girly pinks but looking back at the pictures it's really growing on me. It's a nice vibrant rose color and the shine makes it perfect.

Sally Hansen Color Foil Titanium Flush Swatch

As usual I'm wearing two coats with no base coat. This color has the same application and wear as the others. I'm not wearing top coat for these pictures, but I added it afterwards and it doesn't dull the shine at all.

Sally Hansen Color Foil Titanium Flush Swatch