I love the look of water marble nails, but they can be pretty tricky to do right and it's excessively messy. I hate having to tape off all my fingers and then wish on a thousand stars that I dip them right the first time and won't have to start all over. I've recently been playing around with water marble decals and I love it. This method is so much easier and much less messy. I've put together a quick tutorial to show you how it's done.
Start by prepping your work area. You'll need a cup of water (I use room temperature filtered water). You'll also need to open all your polishes and arrange them around the cup so they're ready to go. Drop the polish quickly so it doesn't dry before you're ready to make the design.
Create your bulls-eye by dropping polish just above the surface of the water. You may need to help the bulls-eye spread by running a toothpick around the outer ring. Be careful not to touch the polish at this point or it may start to pull apart.
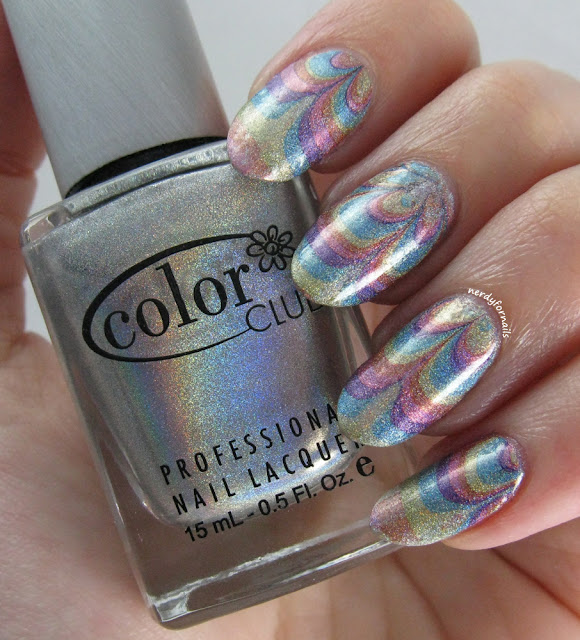
I've used polishes from the Color Club Halo Hues collection for this water marble. Newer bottles of thin polish tend to work the best for marbling since they spread more easily. If your polish isn't spreading you may want to try a different kind. Some polishes just don't work well so try a bunch until you find good ones.
After you've finished your bulls-eye quickly use a toothpick to draw a design. Don't start at your outer most ring since that one is almost completely dry by now. Starting at the 2nd or 3rd ring drag the toothpick through the polish to create your design. Once the design is to your liking leave the disc of polish to dry in the water for at least 30 minutes. I usually make 2-3 marbles at a time so I'll have enough to cover all my nails.
Once it's dry use a toothpick or other small tool to pry the edges away from the cup and gently lift it out onto a paper towel. Be careful not to let it fold or stick onto itself. Gently pat your decal dry and it's ready to work with. The holo polishes are a little thinner and more fragile than regular creme polishes and this decal developed some holes. I just worked around those when I was sticking it to my nails. The decals tend to dry out and become brittle the longer they sit so it's best to use them right away.
The great thing about water marble decals is being able to position and re-position them exactly where you want. With traditional water marble once you dip your finger(s) you have to skim away the excess polish. With the decals you can also use almost the entire disc since you can cut it apart to use the bits of the design you want. Press the decal down to make it stick. You may need to add a very thin layer of base coat to get it to adhere well. If the polish underneath is too wet it can cause the decal to tear or smear so it's best if your layer underneath is only a little tacky.
You'll want to have the right base color to make your marble pop just like you would with a regular water marble. White is normally the best for creme polishes since it makes the colors appear brighter. For this one I used Harp On It, a silver holo which was perfect for letting the holo marble really sparkle.
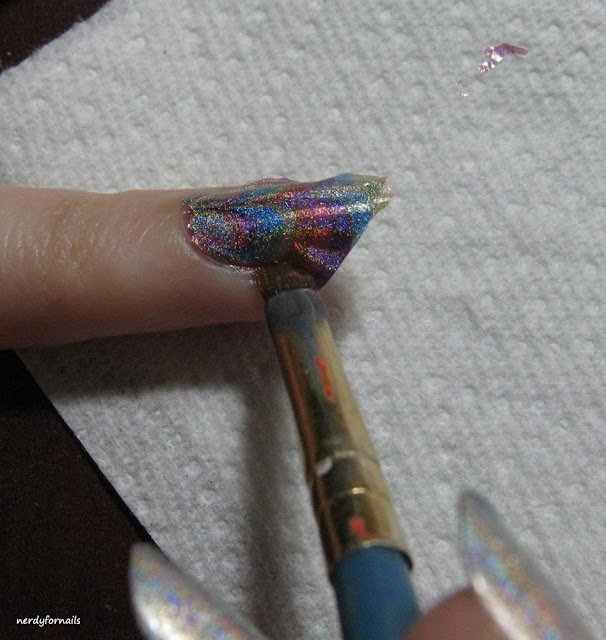
Once I have the decal positioned on my nail I use a pair of small scissors to cut away the excess.
Use a clean-up brush dipped in acetone to melt away the last excess bits of the decal and clean up the edges. Apply top coat and you're all done!
This is a game changer for me. It gives the same beautiful results as a regular water marble and I find it to be so much easier. If you've hated water marbling in the past do you think this technique makes it easy enough to do on a regular basis?


So beautiful, I'm definitely going to try this method now. I only recently figured out how to do water marbling the traditional way and this looks way better. I'm also anxiously awaiting the day when I can get the Color Club holos. Hopefully it'll be soon!
ReplyDelete